The Schedule Wizard is being removed from the product as of the Campus.2435 Release (August 2024).
Use the following tools for scheduling and planning purposes:
Tool Search: Schedule Wizard
Trials are created when a calendar is rolled over from a previous year, when the school uses the Schedule Wizard or when a new school and calendar is created during the implementation process. Trials connect the calendar to the course listing and are used in several scheduling reports.
Multiple trials can be created in the Schedule Wizard for various purposes. However, only one trial (active trial) can be seen by the web application at a time. The scheduling staff may wish to make a trial active at a given time to review the results in the application. Users need to log out and log back into Campus to see the newly active trial.
Unused trials may be kept in the database or may be deleted.
As part of an ongoing project to enhance scheduling tools throughout the product, the Trials tool was updated with a new look to meet current technology initiatives in the Campus.2223 Release Pack (June 2022). Over the last several months, continual updates to Trials behind the scenes have made it possible to release an updated Scheduling Trials that provides access to the new Scheduling Board without having to log in to another application.
Trials can still be accessed through the Schedule Wizard for the foreseeable future.
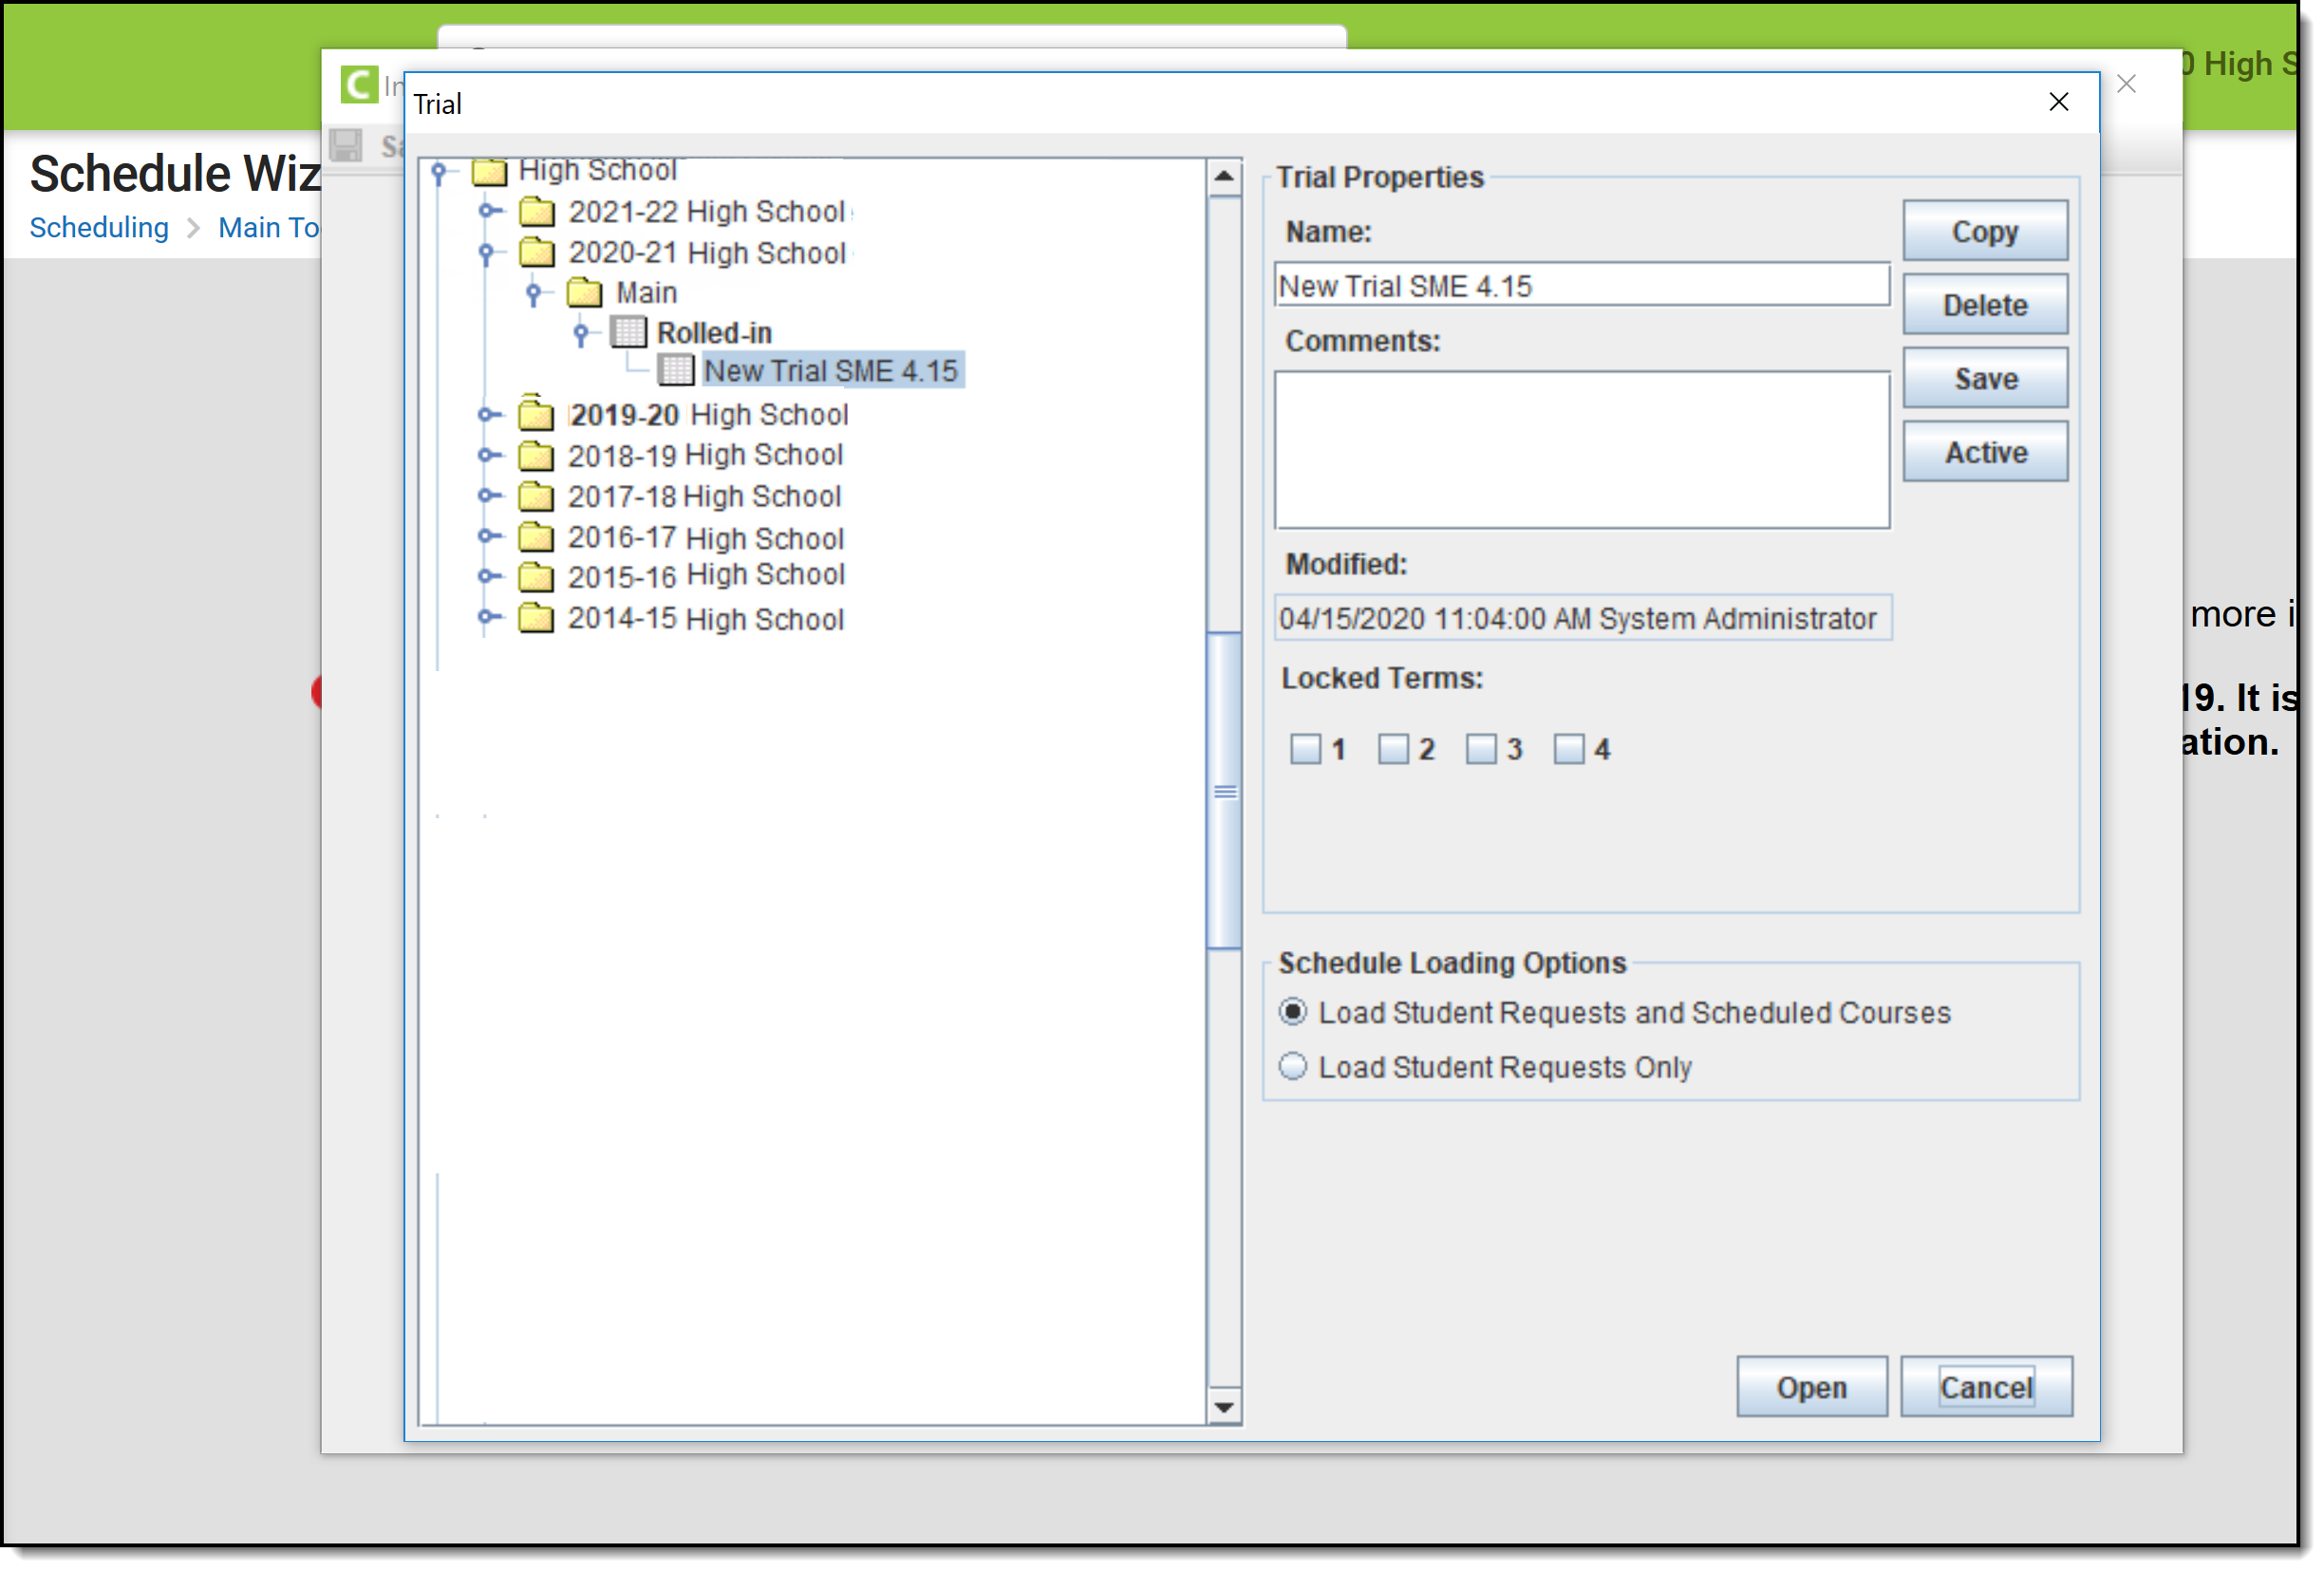 Schedule Wizard - Trial Selection
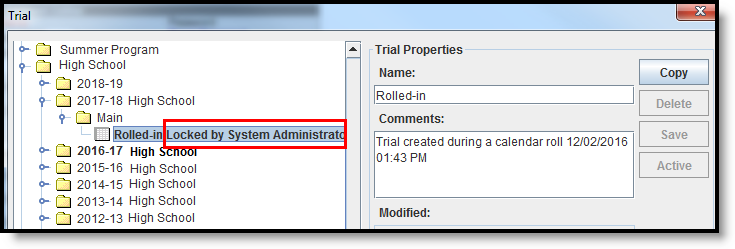
New calendars that have just been rolled over have a trial named Rolled In. This is the original trial that was created. Leave this trial as it is, so there is a starting point to refer to - to see how courses were scheduled in the previous year or to start the process again. If a trial was accidentally active, the original trial can be used to return the schedule to where it was.
Trial Editor
The Trial editor lists all the schools within the district and their associated trials on the left-hand side and the properties of the selected trial on the right-hand side. The most recent year displays first (for example, 2018-19 school year displays above the 2017-18 school year).
Active school years and calendars display in bold text in the Trial tree, as does the active trial for the school and calendar. The hover display indicates the active trial.
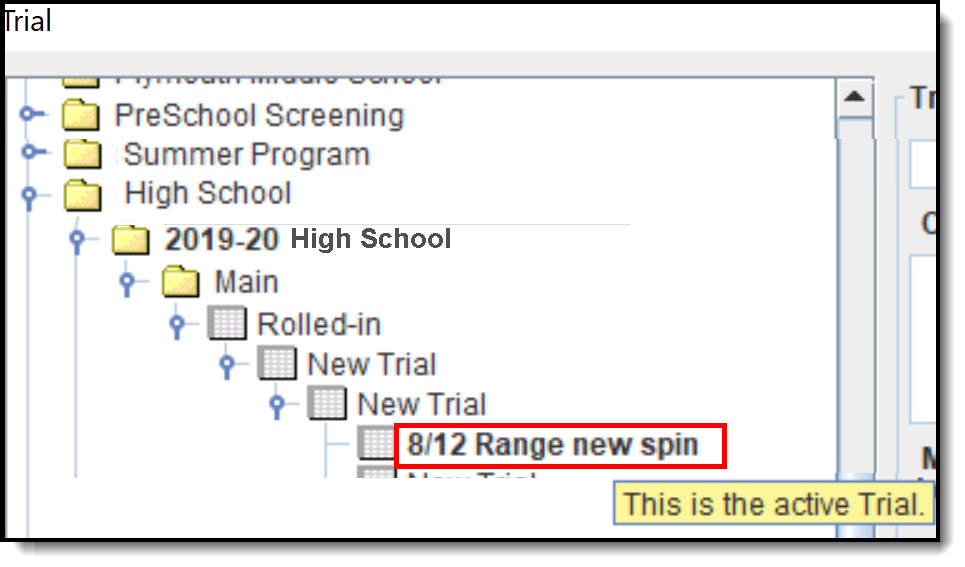 Active Trial Display
A school may have a large amount of trials for any given year, making it time-consuming to open each folder for the school and selecting each trial and sub-trial for each one. To help with the viewing of trials, the list of available trial options for the selected school auto-expands.
Trial Properties
The Name of the Trial and any Comments related to that trial display first in the Trial Properties, on the right hand side, along with when that trial was last modified. Name and Comments should be descriptive enough so users know what that version of the trial did. For example, a particular trial was created to schedule Special Education students or a trial only for PSEO/secondary education students.
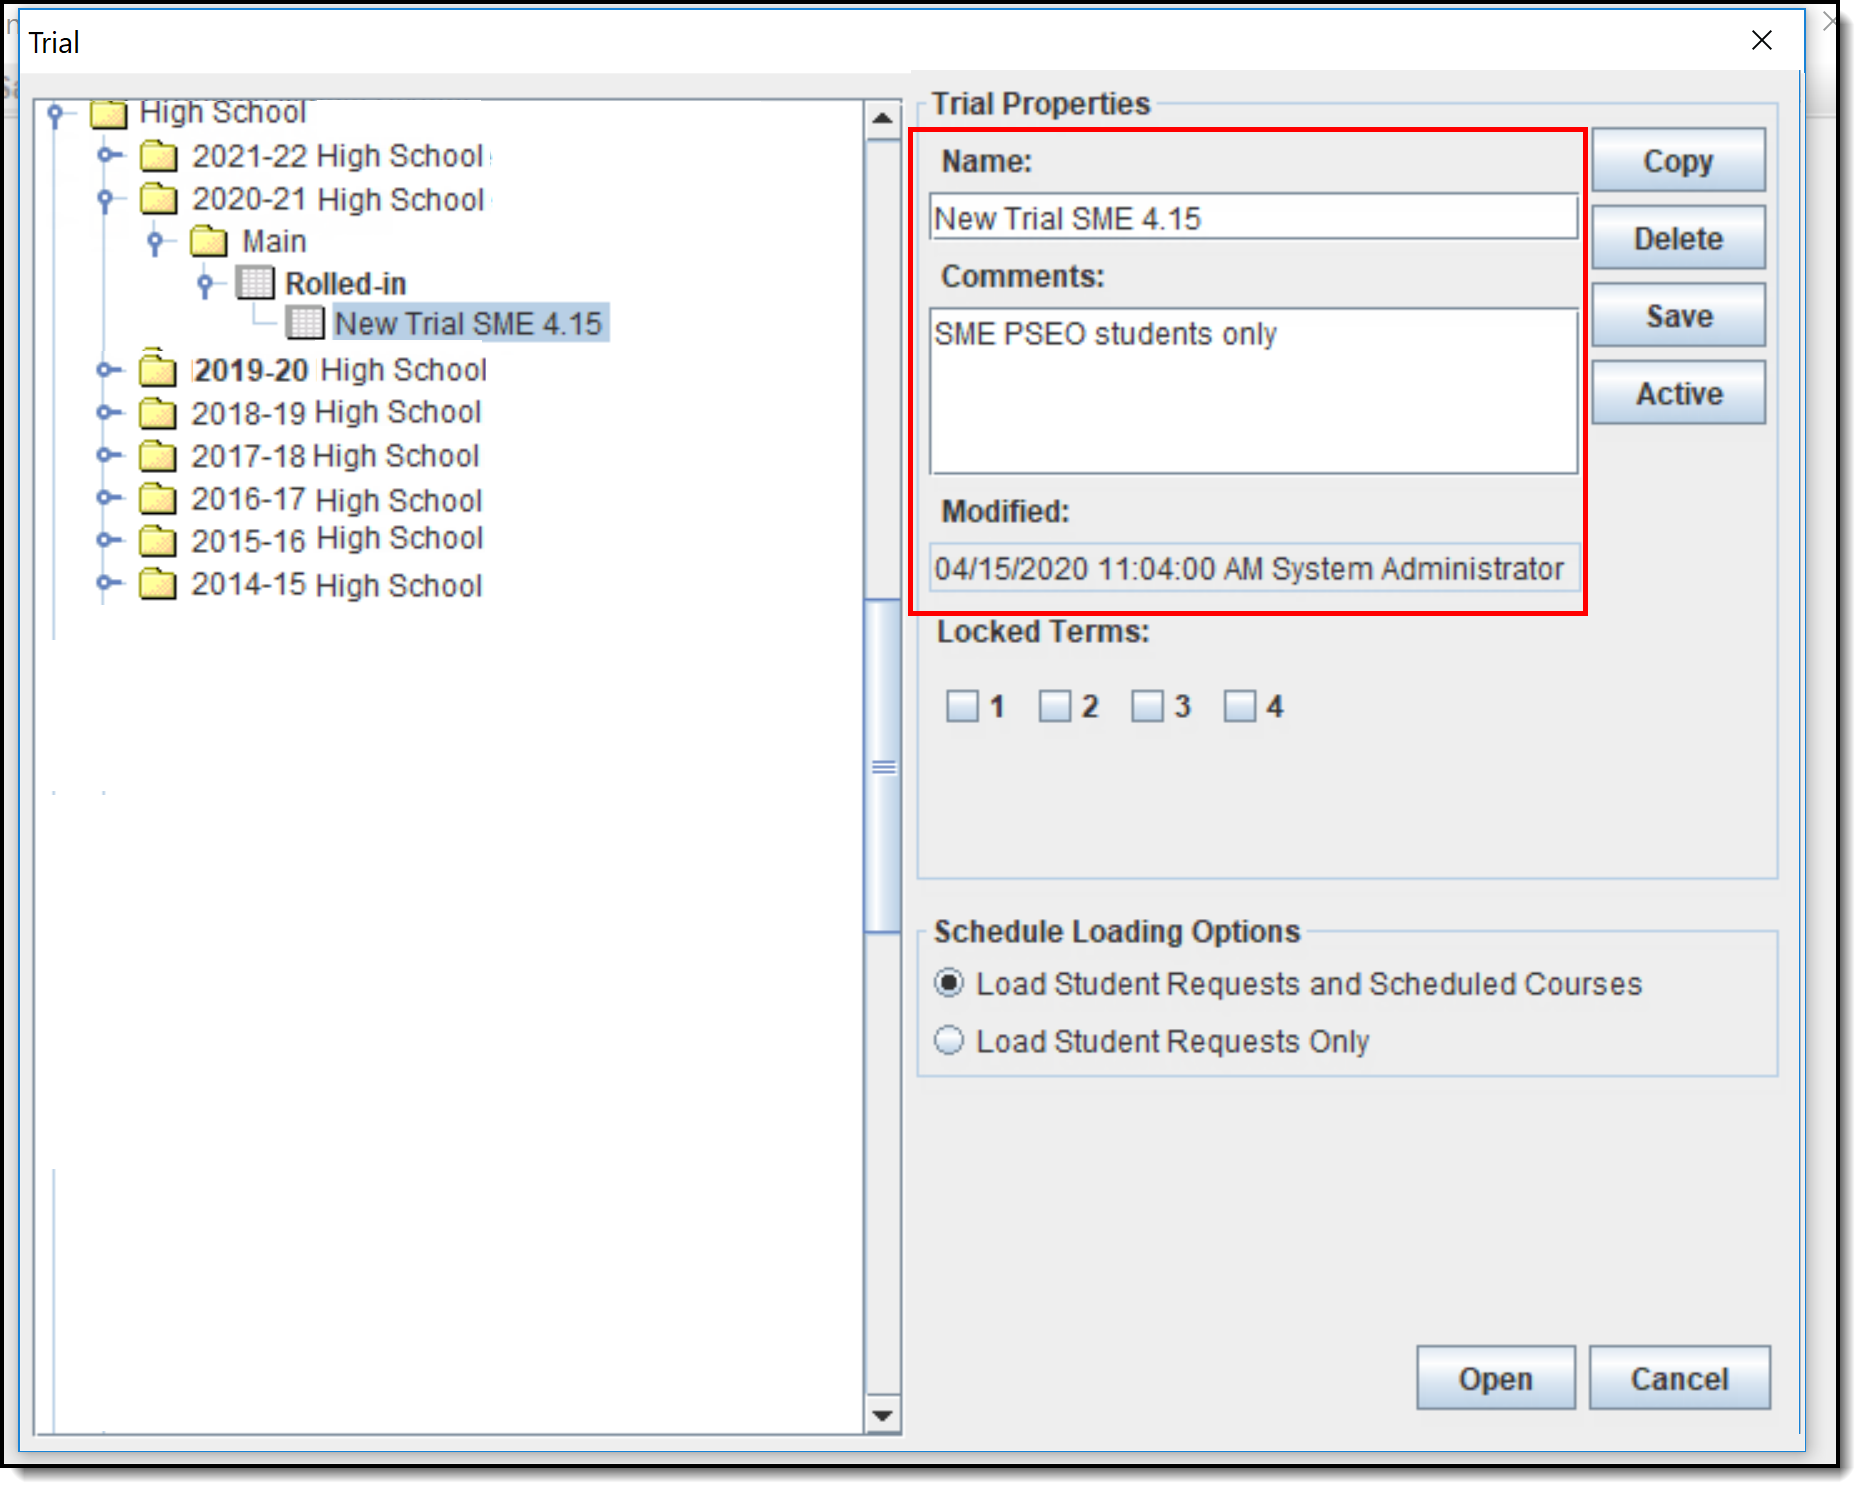 Trial Properties - Names, Comments, Modified Information
Locked Terms
Terms that have been scheduled and should not be changed display in the Locked Terms section. Making changes to an active trial through the Schedule Wizard after a term has started is not recommended. To prevent unforeseen data loss and to prevent users from modifying course section data for current terms, terms can be locked for a trial here. Terms are locked when the trial is made active or when no additional changes are made to that term.
Terms can be locked and unlocked (and saved) from the Trial Selection screen for future calendars when viewing an active trial for a current year calendar.
Making section changes in the Campus application (on the active trial) and saving those changes in the Schedule Wizard causes an error and those changes may not be saved. When this happens, a message displays indicating some of those data changes may not have saved. Close and re-open the trial in the Schedule Wizard. As mentioned previously, make changes either in the Schedule Wizard or in the Campus Application.
Checkboxes for all available terms display for the selected trial. Calendars may have up to 31 terms.
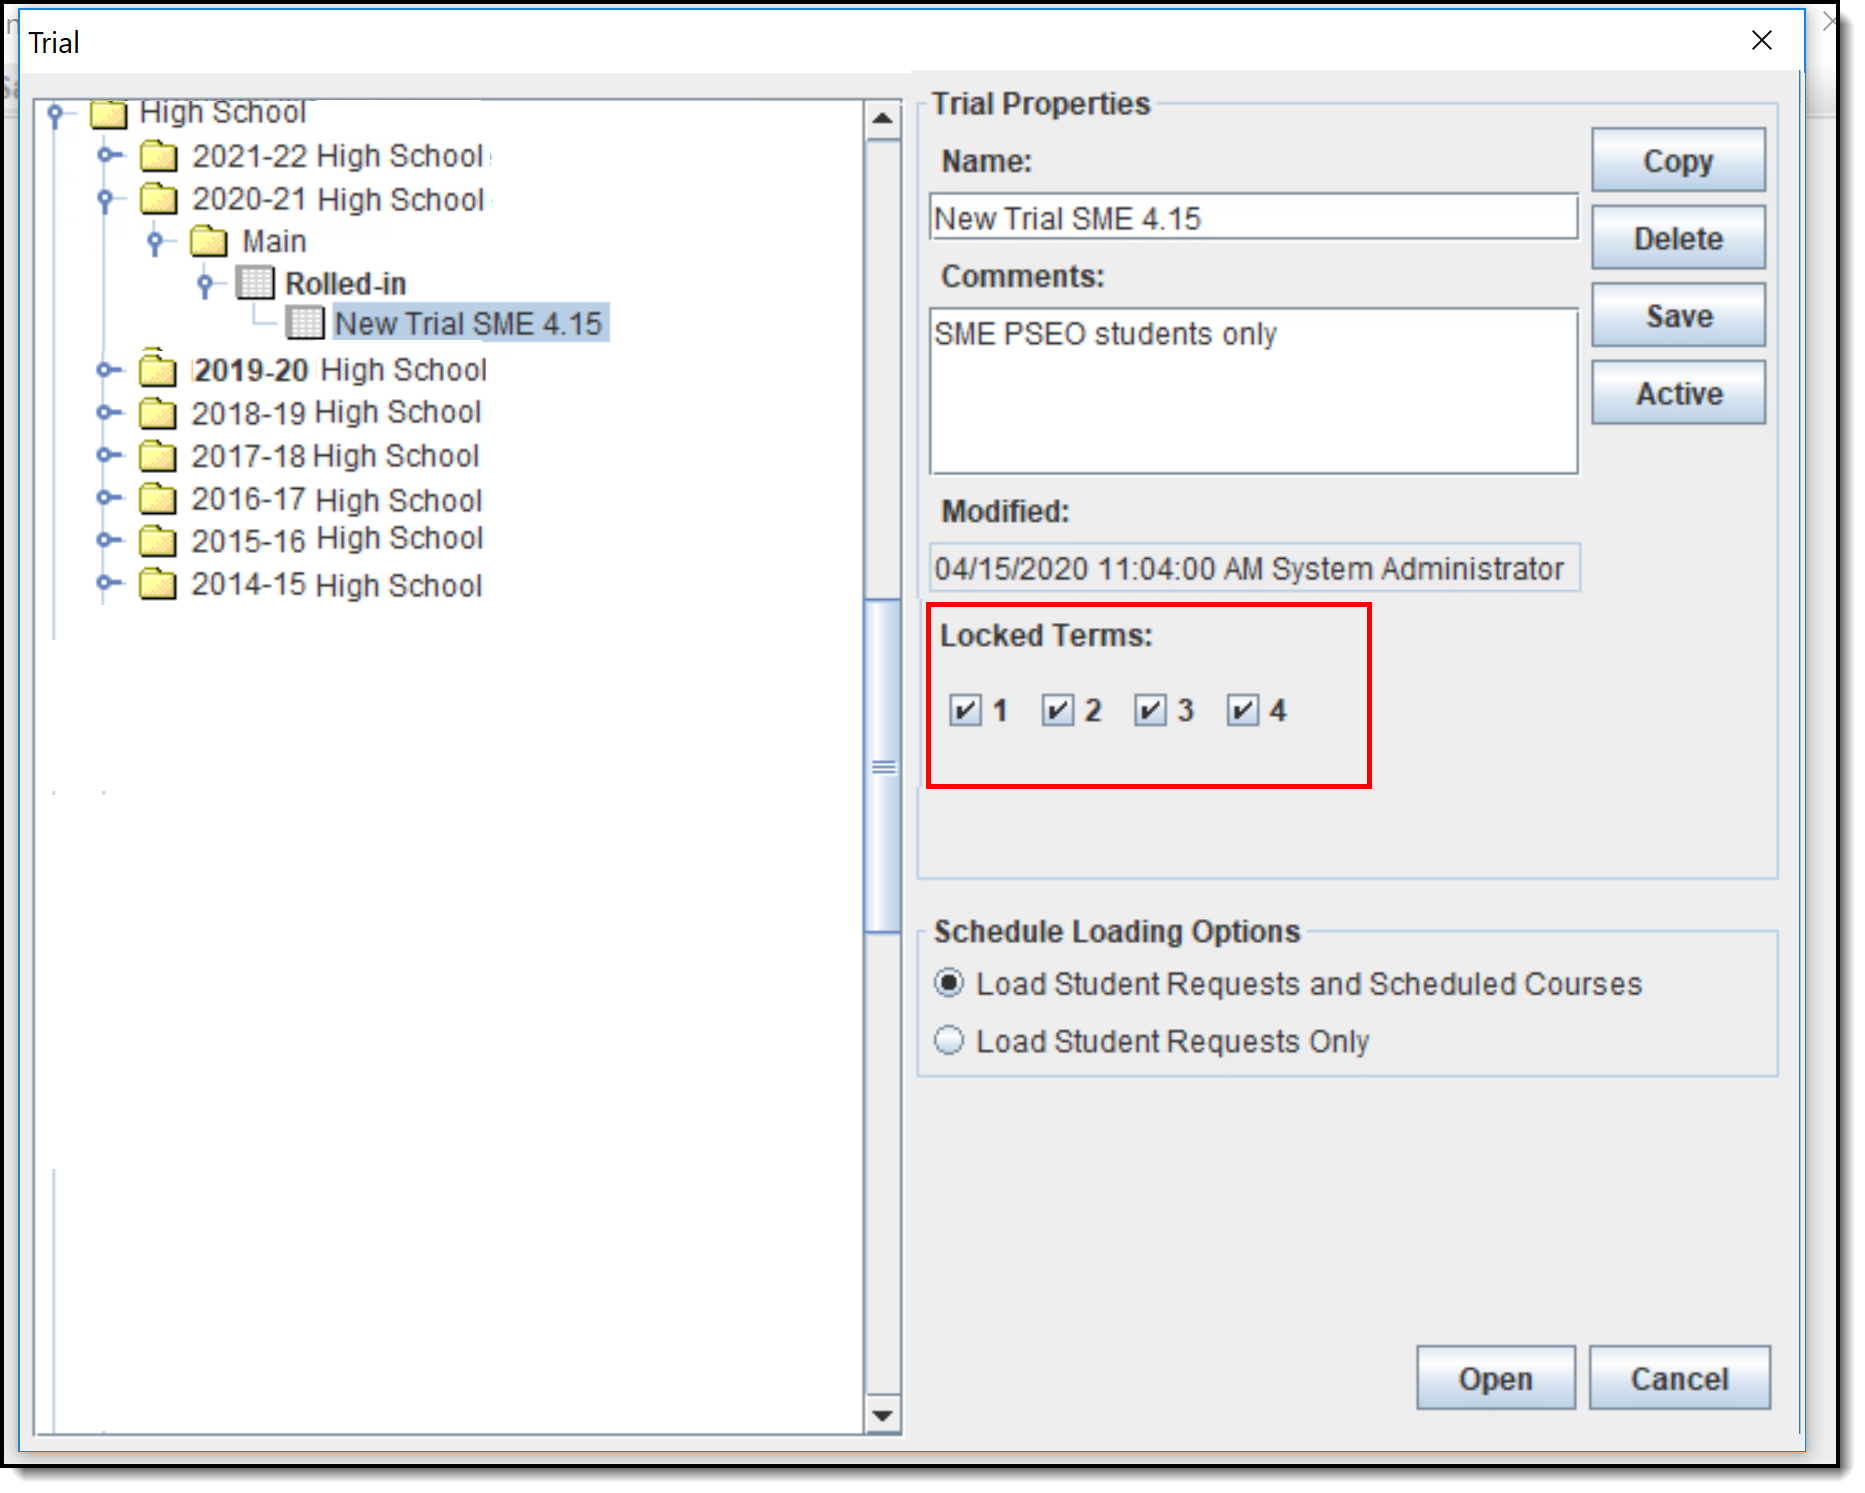 Locked Terms on Trial Properties
Schedule Loading Options
Two options are available when determining which information to load in the Schedule Wizard - either student requests only (those requests entered through Course Registration processes) or student requests and and already scheduled courses. These selections affect the load percentage and may alter the placement of course sections. The default selection is the loading of both student requests and scheduled courses.
- The Load Student Requests and Scheduled Courses option provides a better overall view of what the master schedule is.
- The Load Student Requests Only option can be selected to modify and review course section placement. Any sections manually placed or any students manually scheduled into a course section are not represented.
Locked Trials
To prevent users from accessing the same trial as another user, and potentially overwriting schedule changes made by that user, when a trial is selected by one user, all other users are prohibited from selecting that trial. On the Trial Selection screen, text displays indicating another user is currently in that trial. The locked trial can only be copied, creating another version of that trial.
If a trial is in locked status, the trial can be unlocked from the Scheduling Trials tab by and administrator.
 Locked Trial Display
When the active trial is locked in the Schedule Wizard, other scheduling tools cannot be modified in that same calendar, to prohibit other changes from being made. A message displays indicating changes cannot be made until the trial is unlocked (saved).
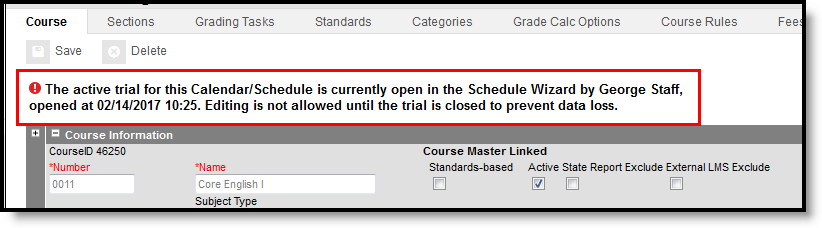 Locked Trial Display on Scheduling Tools
This message displays for the following tools:
- Walk-In Scheduler
- Courses
- Course Rules
- Course Sections
- Staff History
- Roster Setup
- Roster Batch Edit
- Student Gap Scheduler
- Schedule Gap Filler
- Scheduling Build Constraints
- Student Constraints
- Section Templates
- Request Wizard
Copy Trials
Copying trials allows a user to play with course placement, rules and constraints that can be added, and attempt to get a higher percentage of schedules full. When a trial is copied, the name of the trial becomes New Trial. Modify the name as needed for easy recognition.
A new trial (brand new, no courses) cannot be created as a trial is created with the creation of a calendar. That means there is always an original trial available.
- Select an existing trial from the left-hand side of the Trial editor. The name of the trial displays on the right hand side in the Trial Properties area.
- Click the Copy button. This copies the existing trial, including placed sections and courses, into a new version of the trial that can be changed as often as necessary, and the original version remains intact.
- Change the Name of the new trial. Examples of often used names are the initials of the user and the date it was made or the name of the school, or what was done in that trial (Band Version 032305).
- Enter Comments about the trial.
- Click the Save icon when finished. The new trial displays as a child of the parent trial.
NOTE: If copying a trial takes minutes to complete AND your state uses Ed-Fi for collecting student and school data, verify Ed-Fi Configurations for past school years have been deleted.
The current school year and the last school year can remain. For example, a district that has configurations for the 2017-18, 2018-19, 2019-20 and 2020-21 school years can safely delete the 2017-18 and 2018-19 configurations.
Delete a Trial
- Select the Trial to be deleted. The name and any comments display in the Trial Properties.
- Click the Delete icon. This permanently deletes the trial.
No warning message or validation displays when the Delete button is selected. Take care when performing this action.
Save a Trial
- Select the Trial to open. The name and any comments display in the Trial Properties.
- Make changes to the Trial Name or Comments.
- Click the Save icon. This updates the details of the trial.
Saving a trial does not make it active. It just updates any changes made to it, including placement of courses and sections, etc. for use at a later time.
NOTE: If saving a trial takes minutes to complete AND your state uses Ed-Fi for collecting student and school data, verify Ed-Fi Configurations for past school years have been deleted.
The current school year and the last school year can remain. For example, a district that has configurations for the 2017-18, 2018-19, 2019-20 and 2020-21 school years can safely delete the 2017-18 and 2018-19 configurations.
Make a Trial Active
When a trial is made active, the information stored in the Schedule Wizard is essentially copied to the Campus application. All information within that trial is available for use by all other staff at the school. Courses and sections placements, teacher schedules and student course schedules are updated for the calendar year in which the trial was activated.
- Select the existing trial that is to be made active from the list on the left. The name of the trial displays on the right hand side in the Trial Properties area.
- Change the name of the trial. Examples of often used names are the initials of the user and the date it was made or the name of the school, or what was done in that trial (Band Version 032305).
- Click the Active button when finished. This makes the selected trial active and update the course layout that is viewable within the Campus application.
Changing which trial is active can only be done in the Schedule Wizard using the process outlined above. Trials are also viewable from the Scheduling module.
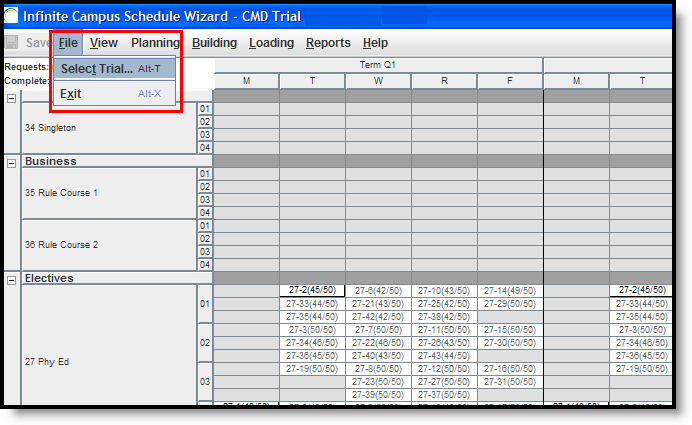
Select a new trial from within the White Board of the Schedule Wizard
- Navigate to the File menu and select the first option Select Trial.
- A new screen displays listing all available school calendars and trials.
- Follow the steps described in the section of this document called Selecting the Calendar and Trial.
To save each entry as an individual layer, use the Save Trial Load option on the File menu.
 Choosing a Trial from the White Board
Next Steps
- Review the Checklist for Scheduling and Other Scheduling Tools documentation.
- Open the White Board to build the courses, load sections, generate reports or use the Course Planner or Staff Planner to build constraints.
- If all scheduling items have been completed and any additional changes will be made in the Campus application, mark the Trial active.
