The Roster Copy tool is being removed from the product as of the Campus.2435 Release (August 2024).
Use the following tools for scheduling and planning purposes:
Tool Search: Roster Copy
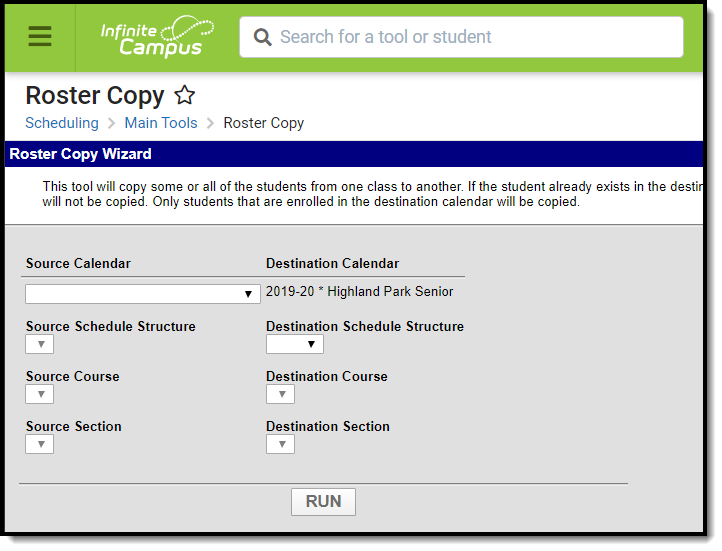
The Roster Copy Wizard allows the placement of students from a section in one calendar to a section in another calendar. If the student already exists in the destination class, the student will not be duplicated, and students who have dropped the source class will not be copied. Only students who are enrolled in the destination calendar will be copied.
Read - Copy section rosters from one course section to another.
Write - N/A
Add - N/A
Delete - N/A
For more information about Tool Rights and how they function, see the Tool Rights article.
Source and Destination
This wizard uses the terminology Source and Destination. The Source Calendar is the calendar from which students will be copied. The Destination Calendar selection cannot be modified and is based on the selection in the Campus toolbar.
For example, the students enrolled in the fifth grade technology course in the current school year in the elementary school are required to be in the sixth grade technology course together in the middle school. The Source course would be the Fifth Grade course and the Destination Course would be the Sixth Grade course, and the calendar selected in the Campus toolbar would be the Middle School calendar.
Users need to select the following source and destination options before rosters are copied:
- Calendar
- Schedule Structure
- Course
- Section
If one of these options is not available for selection, it must be created first.
Use the Roster Copy Wizard to enroll students in a singleton course before other schedule things are done in the Schedule Wizard. This tool is also helpful for those students who desire a specific teacher (or parents desire a specific teacher).
Use the Roster Copy Wizard
- Select the Source Calendar from the dropdpown list.
- Select the Source Schedule Structure from the dropdown list.
- Select the Destination Schedule Structure from the dropdown list.
- Select the Source Course from the dropdown list.
- Select the Destination Course from the dropdown list.
- Select the Source Section from the dropdown list.
- Select the Destination Section from the dropdown list.
- Click the Run button. The wizard will copy the rosters from the source calendar to the destination calendar for those students who have enrollment records in the destination calendar.
- A pop-up message displays when the wizard has completed. Click OK to acknowledge this message. Rosters have successfully been copied.

