The Section Roster Setup tool is being removed from the product as of the Campus.2435 Release (August 2024).
Use the following tools for scheduling and planning purposes:
Tool Search: Roster Setup
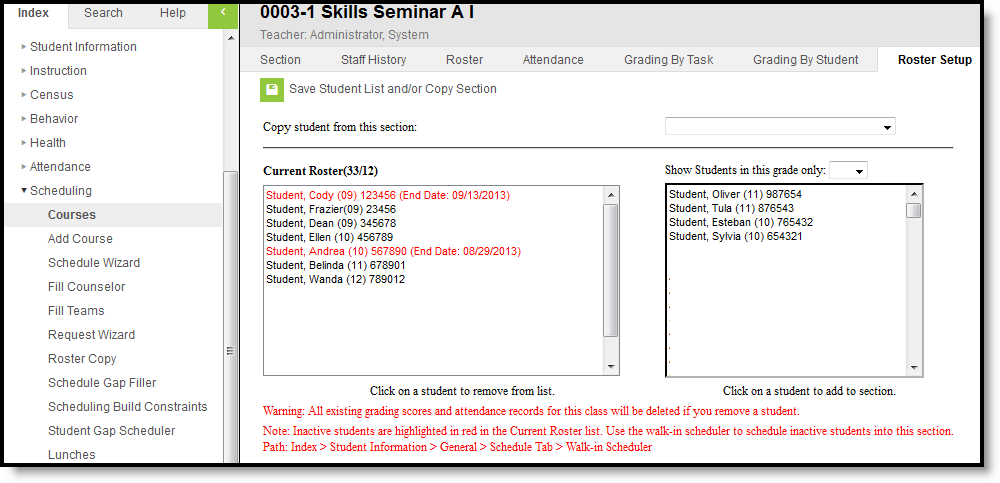
The Roster Setup tab lists the students who are currently in the section and also allows System Administrators or Counselors the ability to quickly create a roster for the section, by selecting a student's name from the list or by copying from another section.
Active students currently enrolled in the section appear in black text. Students who have ended enrollments or who have dropped the course section appear in red text with the end date.
The following System Preference settings affect the Roster Setup tool:
- Students added to a course section with an entered start date will appear in green font, according to the Days to Flag Roster Additions System Preference.
- Course fees will automatically post for students added to a course section, according to the Auto Post Course Fees System Preference.
 Roster Setup Tool
The Roster Setup tool should only be used BEFORE a Course Section begins. If a student needs to be removed from the section after the term start date or the student ended enrollment in the school and has since returned, use the Walk-In Scheduler.
Read - View students on a roster.
Write - Add or remove students from a roster.
Add - N/A
Delete - N/A
See the Tool Rights section below for more details on what actions can be performed with each right.
Students can be added to a Section Roster in two ways:
When scheduling a student into a section of a Course, any fees assigned to the course will be added to the student's Fees tab if the fee is not already assigned to the student.
Student Constraints DO NOT display on the Roster Setup tab. If there is concern about having certain students in a course section, use the Student Constraints tool to manage their placement.
Copy Students from an Existing Section
- Select from the dropdown list the section from which to copy students. This list includes responsive section offerings.
- Click the Save Student List and/or Copy Section. Students in the selected section will be copied into this section.
Student names will only appear AFTER the information has been saved.
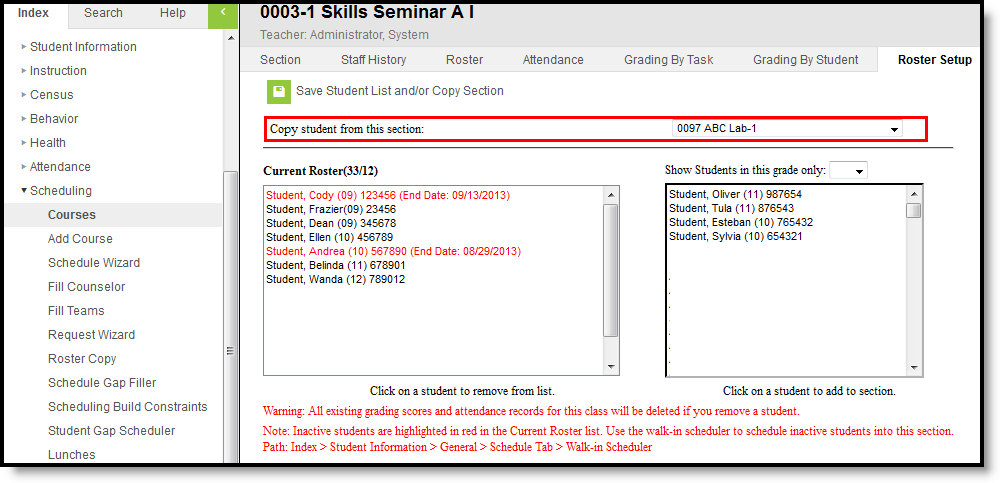 Copying Students from an existing section
Manually Add Students to the Section
- Select students to move into the section by clicking on their name in the right hand column. Their name will then be displayed in the Current Roster column.
- Click the Save Student List and/or Copy Section icon when finished.
If the section is for a specific grade level (i.e., Health is only for 9th grade students), select the grade level from the dropdown list. Only students in that grade level will be available for selection.
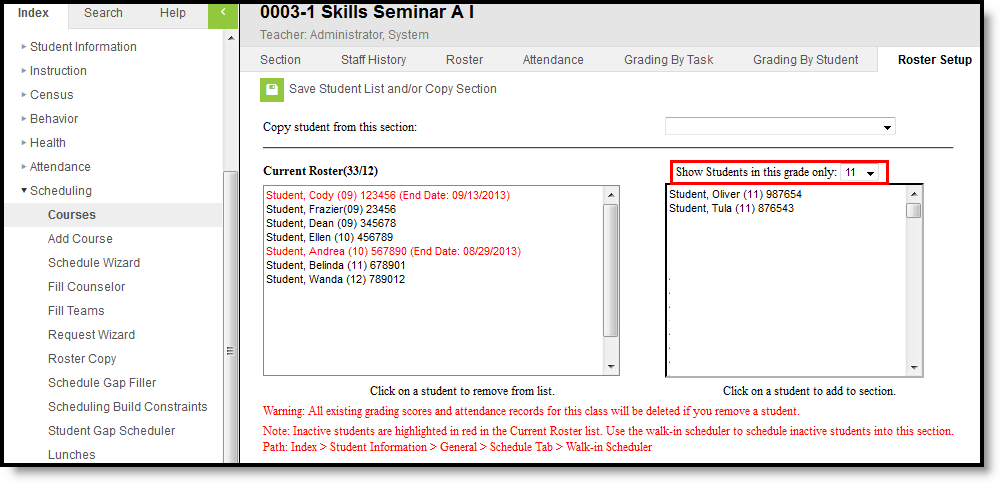 Grade Selection
Remove Students from a Section
This process should only be done if the Course Section has not begun, meaning the term start date has not occurred.
- Click the student's name to remove from the Current Roster column. This will remove the student from the left-hand column and place it in the right-hand column.
- Click the Save Student List and/or Copy Section icon.
When removing students from a section, all existing grading scores and attendance records for that student will be deleted.
When a student is removed from the section and attendance data is deleted, a record of this action is recorded in the Audit Attendance table.
