The Schedule Wizard is being removed from the product as of the Campus.2435 Release (August 2024).
Use the following tools for scheduling and planning purposes:
Tool Search: Schedule Wizard
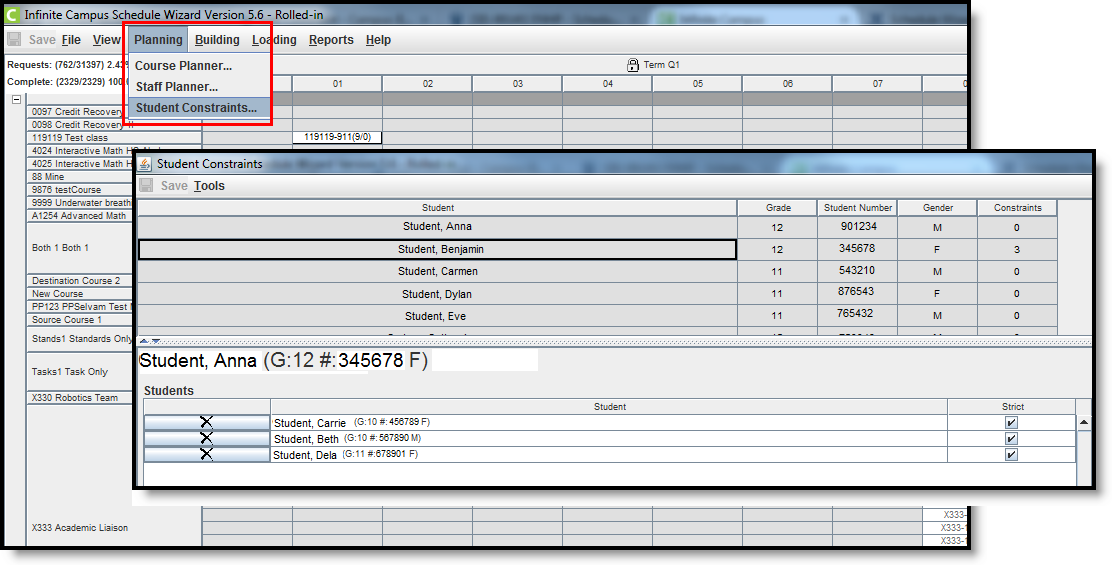
The Student Constraints tool in the Schedule Wizard Planning Menu allows users to limit a student's interaction in classes with another student, or with multiple students. Constraints are used when loading course requests, and can be either a strict constraint (student are not placed) or a not strict constraint (student should not be placed).
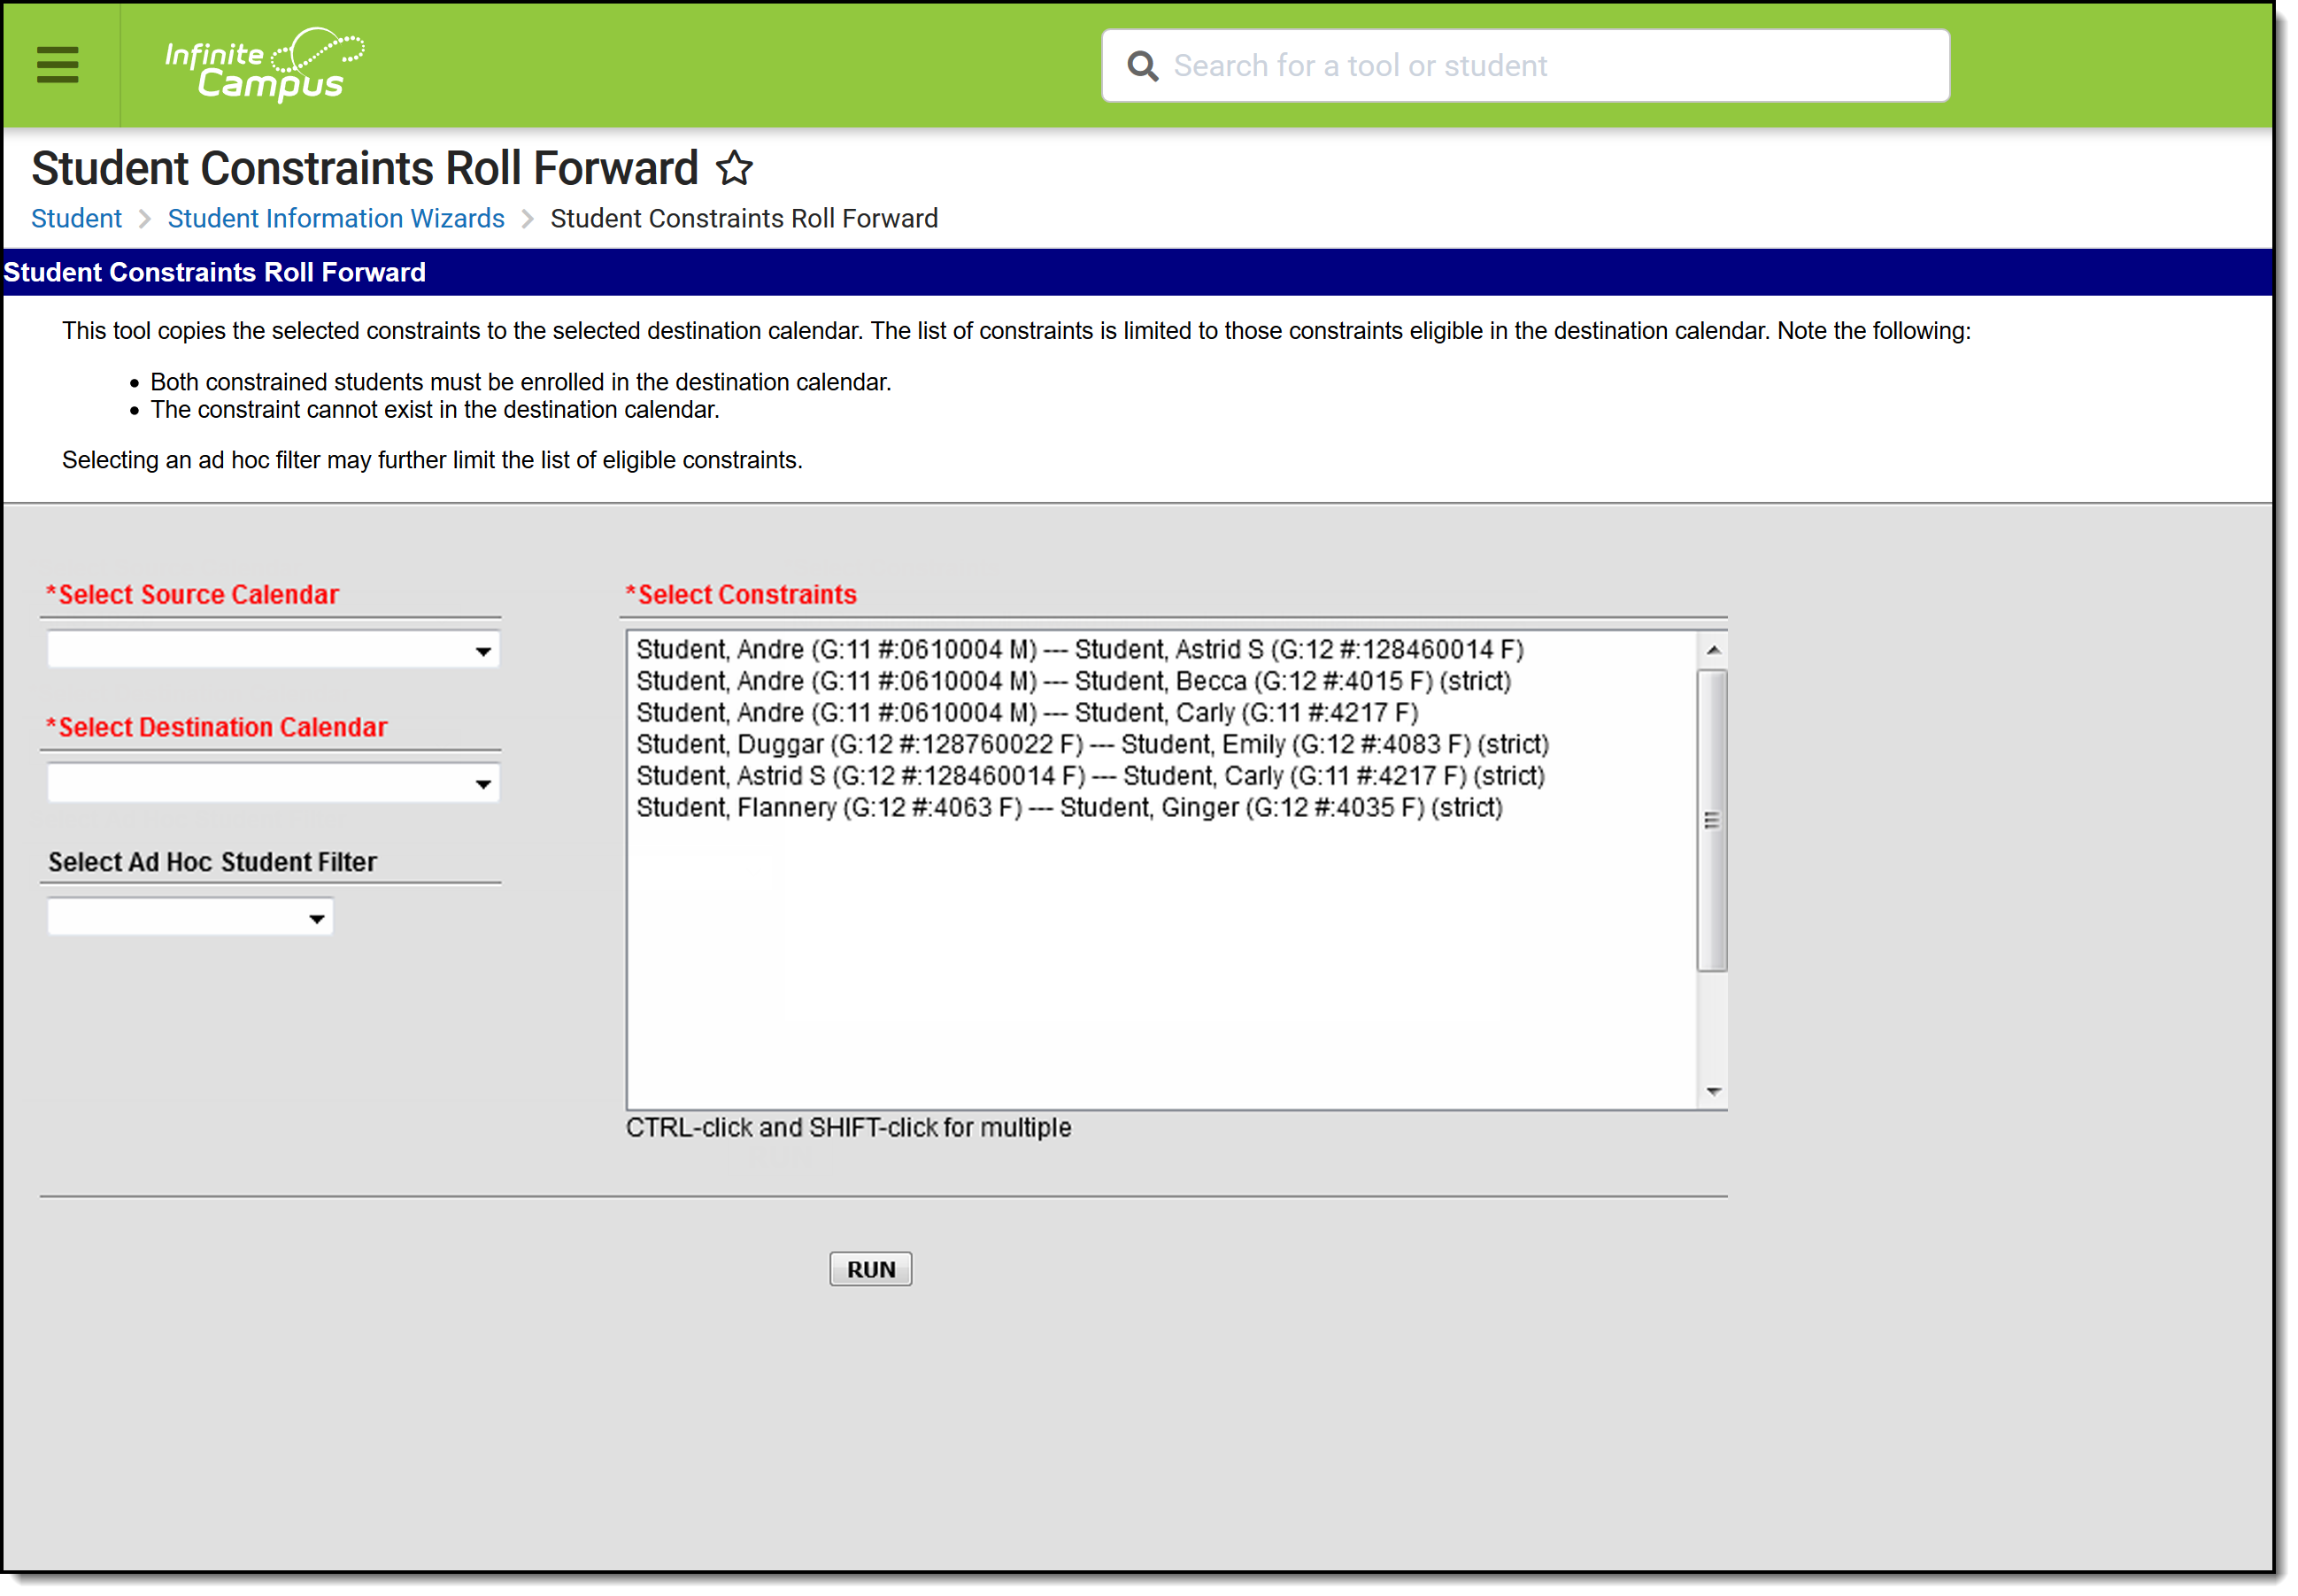
Student Constraints can also be entered using the Student Constraints tool in the Scheduling Module, and can be rolled forward into future calendars using the Student Constraints Roll Forward tool.
 Schedule Wizard Student Constraint Tool
Constraints can be added for any reason deemed necessary by the staff (Principal, Counselor, Teacher) or by a Parent/Guardian's request. Mostly, constraints fall into these two scenarios:
- Not Strict Constraint. Abigail and Anna are twins. Their parents have requested that whenever possible, Abigail and Anna are not in the same course sections at the same time. This would be a "not strict" constraint. For example, if both Abigail and Anna need to take Spanish II in third period because Abigail has Soccer the other time it is offered, and Anna needs to stay with the same teacher she had for Spanish I, they may be in the same section.
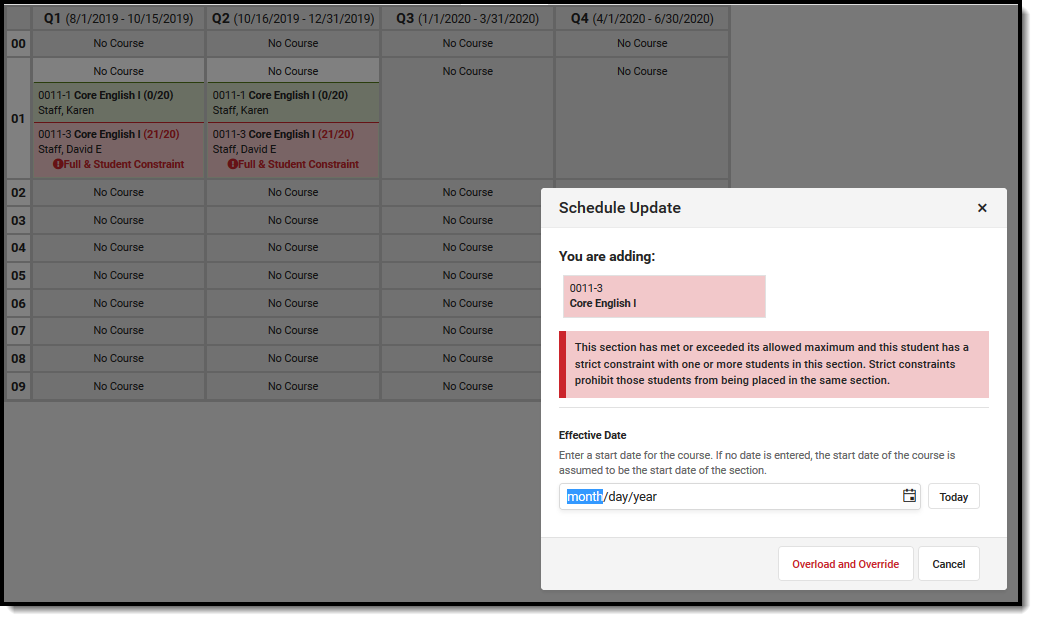
- Strict Constraint. Ryan and David have frequent behavioral issues when they are in the same class as James. It can be distracting for other students, and prohibits them from learning, and causes more tension than needed for all of the other students and the teacher. The logic creates a constraint all combinations of all three students, and prohibits their placement in the same course sections. Strict constraints can be overwritten in the Schedule Wizard, if necessary.
Note that the more frequent use of constraints may limit the successful placement of students in their requested courses.
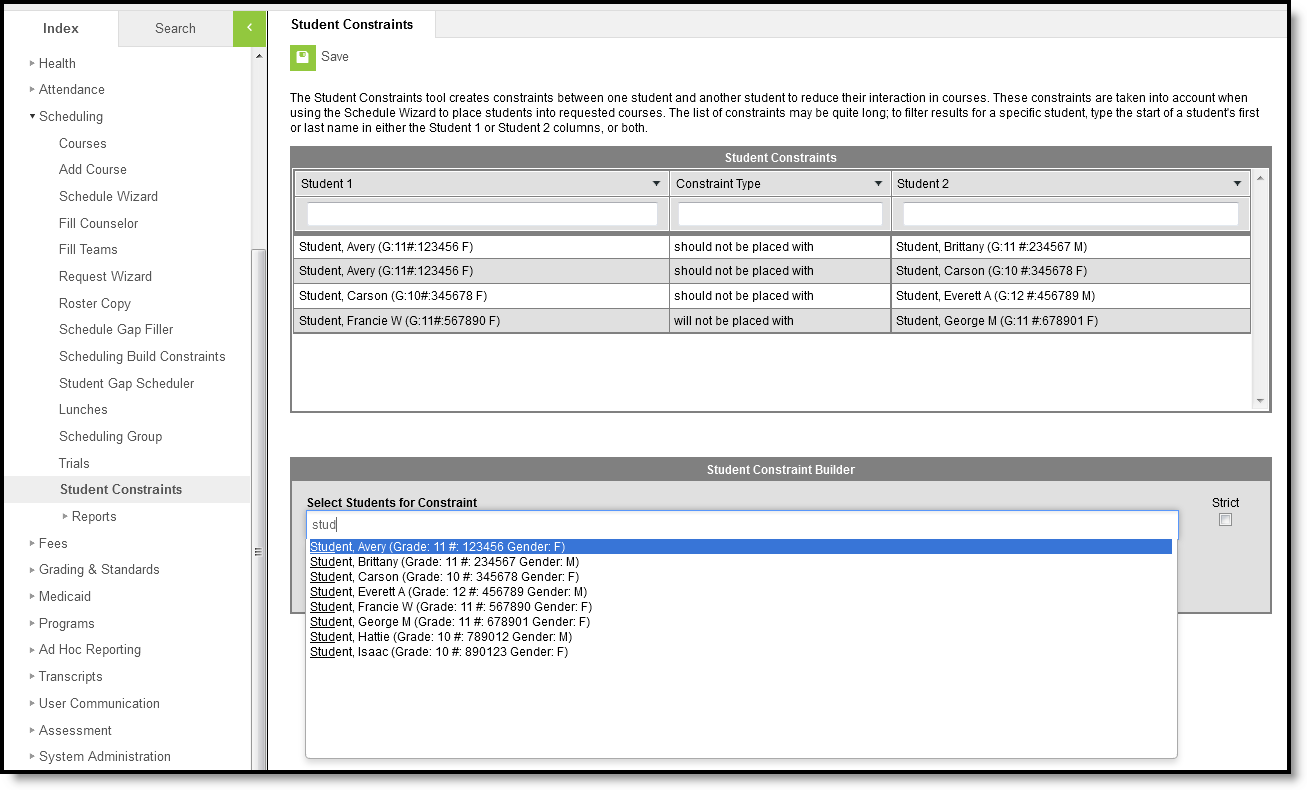
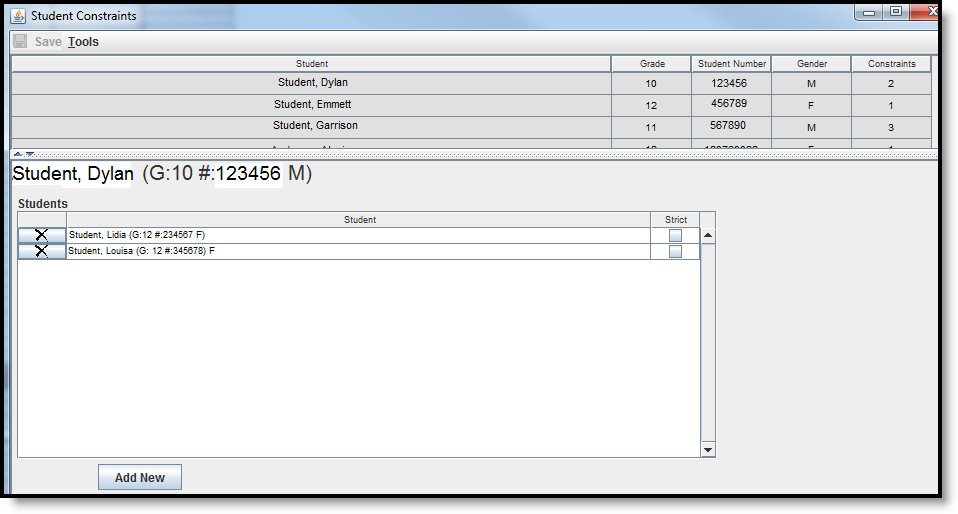
View Existing Student Constraints
All students enrolled in the calendar for which the trial is open display in the Student column. This list of students can be sorted by any of the columns included - Student Name, Grade Level, Student Number, Gender or number of existing Constraints. Click on the gray header to change the sort order.
Select a student from the list (by clicking on any header). The students name displays in the bottom section of the tool. If the selected student has constraints with another student, those students are listed.
 Existing Student Constraints
Add New Student Constraints
- Select a Student from the list.
- Click the Add New button at the bottom of the editor. A blank line is added to the bottom section.
- Click in the blank line and scroll to locate a student.
- If the student should have zero interaction with the selected student, mark the Strict checkbox.
- If the student can be placed in the same course section if necessary, leave the Strict checkbox unmarked.
- Click the Save in the upper left corner.
Import Student Constraints from Last Year
- To import existing student constraints from the last school year, select this option from the Tools menu.
- A popup displays asking if the constraints should be imported. Click the Import button. Constraints are imported into the selected trial.
- When finished importing, the Save icon is red. Click the Save icon.
View Constraints In Other Scheduling Tools
Constraints display in the following areas.
| Scheduling Tool | Details |
|---|---|
| Student Constraints Tool | From this option in the Scheduling module, all constraints for all students can be viewed.
|
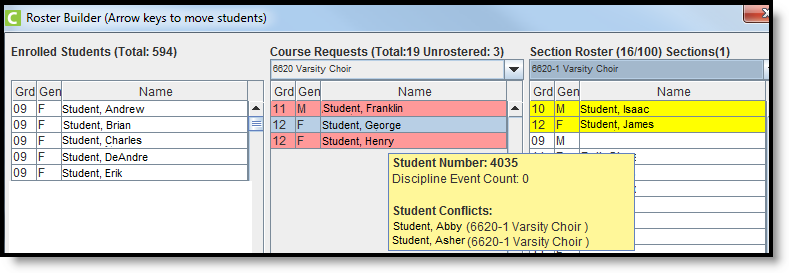
| Schedule Wizard Manual Roster Builder | When building a roster for a particular course, students who have conflicts with other students who are scheduled in the same section display in red (if the constraint is strict) or yellow (if the constraints is not strict). NOTE: The red or yellow display only occurs when the View > Conflicts > Student to Student option is marked in the Schedule Wizard.
|
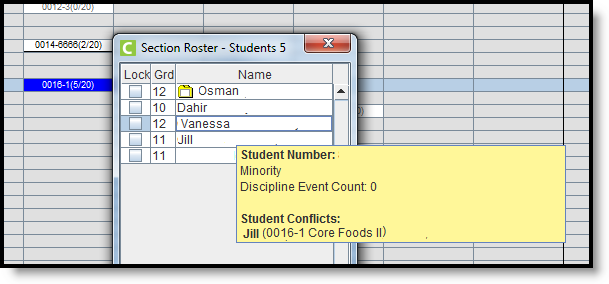
| Schedule Wizard Section Roster | Constraints display for the section roster in the yellow pop-up box.
|
| Walk-In Scheduler | When viewing the Walk-In Scheduler, and the list of student requests display on the right, click the @ symbol to highlight where that section meets on the Schedule grid. When a student constraint exists, that section is highlighted in red. The hover text indicates such, but does not indicate which student(s) may be involved. If the student should still be placed in the section, click the bold text. A warning message then displays indicating a constraint exists. Clicking OK places the student into the section, overriding the student constraint restriction. The course number and section display in red, and the hover text continues to indicate there is a constraint with another student. Note that overriding the constraint does not remove the record in the Student Constraints tool; the override applies to the placement of a student into a section when a constraint exists.
|
| Student Constraints Roll Forward | The Student Constraints Roll Forward tool copies the selected student constraints from the Source Calendar into the Destination Calendar.
|