Tool Search: Calendar Wizard
The Calendar Wizard provides the ability to quickly create new calendars from scratch (blank calendars), to create new calendars from previous calendars (rolling forward) and to copy information into existing calendars.
 Calendar Wizard
The creation of calendars is time-consuming and often requires additional server resources. It is recommended that calendars be created in off-peak hours.
Once the calendar has been rolled, additional modifications will need to be made to Term dates, Period dates and Days. All calendar information should be reviewed for accuracy.
Calendar names must be unique.
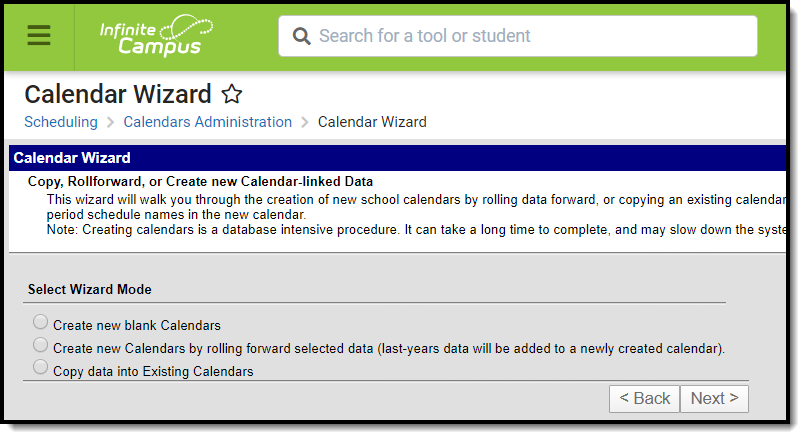
Calendar Mode
The selected Wizard Mode should be chosen carefully. The following table lists scenarios for selecting the Calendar Wizard mode:
Mode | Description |
|---|---|
This option should be used if there is a new school in the district. It will only create a calendar frame (start and end dates). Courses, grading tasks, standards, calendar terms and schedule structures will not be rolled forward and will need to be created manually. | |
This option rolls all related data in the existing calendar into the new calendar. | |
| Copy Data into Existing Calendars | This option is used when a district has multiple calendars in the same year or if the district has already set up one calendar and wants to copy that data to other calendars. This is often used for days and day events. |
Determining What Calendar Option to Choose
The following table provides a high level workflow when creating calendars using the New Calendars by Rolling Forward Selected Data Mode.
Step | Question | Answer | Roll Forward |
|---|---|---|---|
1. | Does last year's schedule of terms and periods reflect what will happen in the next school year? | Yes | Roll the Schedule Structure, Term Schedules and Period Schedules. Proceed to Step 2. |
No | Create a New Calendar using the Blank Calendar mode, then use the Copy/Append options to add additional pieces of Data. | ||
2. | Will the curriculum and courses essentially stay the same as last year? | Yes | Roll courses, grading tasks, composite grading and course rules. Proceed to Step 3. |
No | New courses will need to be added manually or using a Course Catalog. In addition, sections cannot be rolled without the courses. Proceed to Step 4. | ||
| 3. | Should last year's master schedule be used as a starting point for this year? | Yes | Roll sections and section placement. Teacher and Room Assignments may also be rolled forward. Proceed to Step 4. |
No | A new Master Schedule for the next school year will need to be built. Proceed to Step 4. | ||
4. | Will the same set of attendance codes be used for the next year? | Yes | Roll attendance codes. Proceed to Step 5. |
No | New codes will need to be created. Proceed to Step 5. | ||
5. | If using teams, will the teams be the same for the next school year? | Yes | Roll teams. Proceed to Step 6. |
No | New teams will need to be created. | ||
6. | If using teams AND sections were rolled, will each team's master schedule be used as a starting point for the next year? | Yes | Roll section team assignment. |
No | Sections will need to be assigned to a particular team for the Scheduling Board to load students by team. |
Create New Blank Calendars
The Create new blank calendars option should be used if there is a new school in the district, or if a district wants to create calendars from scratch. It will only create a calendar frame (start and end dates). Courses, grading tasks, standards, calendar terms and schedule structures will not be rolled forward and will need to be created manually.
![]() Create New Blank Calendars
Create New Blank Calendars
Select Wizard Mode
- Select the Create New Blank Calendar option.
- Click the Next button.
Edit Calendar Attributes for New Calendars
- Select the Year for this new calendar from the dropdown list. This selection should match the new school year that was previously created. Years are created in the School Year tool.
- Select how the calendar is named in the Name Template dropdown. The field to the left of the dropdown may be used to add additional information (such as a school number) at the start of the calendar name.
- Enter a Number for the calendar. This field is used internally for state reporting purposes and is a three-digit field (001 – 999).
- Enter the Start Date and the End Date of the calendar. These dates should be before and after the dates for the actual school year to accommodate for staff development, weather make-up days, etc.
- Select the Schools for which to build the new empty calendars. Listed will be all of the existing schools in the district.
- Click the Run Wizard button.
![]() Calendar Attribute Selection
Calendar Attribute Selection
Progress and Completion
The Progress screen displays, indicating the status of the new calendar. When the wizard is finished, the new calendar will be available to select in the dropdown list (after refreshing the screen). When it is not, users needs to be given rights to that calendar. Since this was a blank calendar that was created, everything in the calendar structure needs to be established – term dates, period times, etc.
![]() Calendar Creation Progress
Calendar Creation Progress
Create New Calendars by Rolling Forward Selected Data
The Create New Calendars by rolling forward selected data option rolls all selected information from the source calendar into the new calendar.
 Calendar Wizard - Roll Forward Existing Calendars
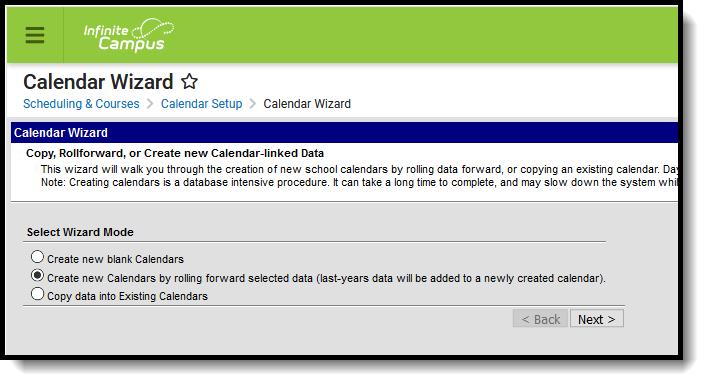
Select Wizard Mode
- Select the Create New Calendars by rolling forward selected data.
- Click the Next button.
Edit Calendar Attributes for New Calendars
- Select the Year for this new calendar from the dropdown list. This selection should match the new school year that was previously created. Years are created in the School Year tool within the Calendar folder.
- Enter a name for the new calendar in the first Name Template field.
- In the second name template field, select the appropriate naming convention for the calendar from the dropdown list – either [year][schoolname] or [schoolname][year]. This can be renamed after calendars are rolled.
- Enter a Number for the calendar. This field is used internally for state reporting purposes and is a three-digit field (001 – 999).
- Enter the Start Date and the End Date of the calendar. These dates should start before and end after the actual school year to accommodate for staff development, weather make-up days, etc.
- Select the Calendars to use for building the new calendar (elementary, middle, high schools) and click the Next button.
![]() Calendar Attributes
Calendar Attributes
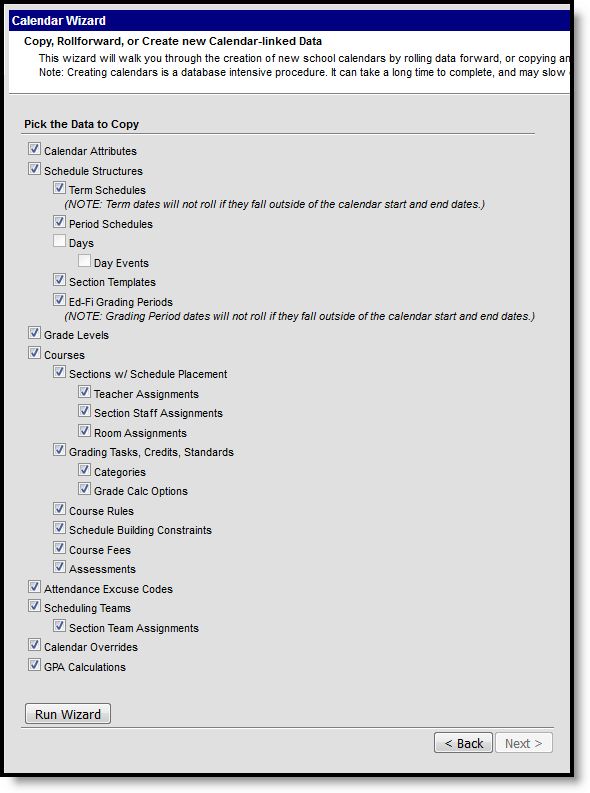
Pick the Data to Copy
- Select the Data to Copy from the list provided in the wizard. To reduce the need for re-entering of data, select as many options as necessary. Descriptions of the available options are at the end of this article.
- When finished selecting options to roll forward, click the Run Wizard button.
 Data to Copy Options
Progress
A Progress Window displays after selecting the Run Wizard button. This indicates how close the process is to completion.
The calendar does not appear for selection in the toolbar until users have performed a hard refresh. This means the refresh button in the browser toolbar needs to be selected, or a shortcut of CTRL-F5 can be done. If this still does not allow the new calendar to be selected, log out completely by using the Log Off option in the Index and then log in again.
Term start and end dates do not roll.
Roll Forward Options
The following are definitions of the options available for rolling forward.
Option | Definition | Location |
|---|---|---|
Calendar Attributes | This includes the name of the calendar, calendar ID, school name, student minutes, etc. When marked, this rolls all of information entered on the Calendar Information tab except the Calendar Name into the new calendar. This option should be marked if using the School choice with Student Assignment process. | Calendar Information |
Schedule Structures | Schedule structures allow building administrators to have multiple calendar layouts in one calendar, for course layout or for state reporting purposes. | Schedule Structure Setup |
Term Schedules | This divides the school year into blocks of days for the purpose of scheduling or grading (i.e., quarters, semesters, etc.). | Term Setup |
Period Schedules | This displays the period name and the start and end times of each period. A school must have at least one period schedule defined, but may have multiple if using the day rotation. | Period Setup |
| Days | Days are used to determine attendance, non-school days and non-instructional days. | Day Setup |
| Day Events | Day events are notes within the calendar day, perhaps indicating an early release day or the dates of school plays. | Day Setup |
| Section Templates | Section Templates are used when placing sections for districts that use a more complex schedule (waterfall, rotating days, etc.). These can only be copied if Schedule Structures, Term Schedules and Period Schedules are also selected to be copied. | Section Template Information |
| Portal Calendar and Term Settings | Calendars & Schedule Structures are assigned to Display Options templates to determine what data for that calendar displays in Campus Student and Campus Parent. The template selected for a calendar/schedule structure is chosen by default when the calendar is rolled. Within Display Options, the Calendar Settings determine whether data for a calendar is enabled and the Term Settings determine whether data for specific terms are enabled. Note: rolling Term Settings forward only copies the configuration to automatically enable terms and does not copy which terms are actually enabled. | Portal Display Options |
| Ed-Fi Grading Periods | The Ed-Fi Grading Periods aligns the calendar periods to grading terms (for Michigan, Nebraska and Wyoming districts). NOTE: Grading Period dates do not roll if they fall outside of the calendar start and end dates. | Ed-Fi Grading Periods |
Grade Levels | Grade levels define the available grade levels of student enrollments. | Grade Level Setup |
Courses | This option creates an index of courses with course names. Rolling courses saves manual entry time of course names and section names. Courses marked as Inactive in the source calendar roll forward to the new calendar as inactive courses. | Course Information |
Sections with Schedule Placement | This option builds the same course sections in the new calendar as exist in the current calendar. Schools may select not to roll course sections, depending on the size of the student body, and may opt to create sections separately. | Section Information > Schedule Placement |
Teacher Assignments | This option allows teacher assignments in the current calendar to be assigned to the same course section in the new calendar. This requires that teachers have a district assignment in the current and new calendars. | Scheduling > Courses > Sections > Teacher Name |
Section Staff Assignments | This option allows staff assignments to be copied between calendars. This requires that staff have a district assignment in the current and new calendars. | Section Information > Staff Name |
Room Assignments | This option schedules the section in the same meeting place in the new calendar as it was in the original calendar. | Section Information > Room |
Grading Tasks, Credits, Standards | This selection copies the items that are used for scoring students on term grades and the appropriate credits into the new calendar. | Course Grading Tasks |
| Categories | This selection copies any categories associated with courses into the new calendar. | Course Categories Course Categories |
| Grade Calc Options | This selection copies any grade calculation options associated with courses into the new calendar. | Course Grade Calc Options Course Grade Calc Options |
Course Rules | Course rules are assigned to courses and are used in the Scheduling Board and in Academic Planning. This option applies the rules assigned to the courses in the original calendar to the same courses in the new calendar. | Course Rules |
This is the configuration for how a course is built by the Scheduling Board. | Course Build Constraints | |
Course Fees | This option copies all active course fees in the current calendar into the new calendar. | Course Fees |
| Assessments | Assessments created in the Test Setup tool can be assigned to courses and course masters. When marked, those assessments from the current calendar are copied into the new calendar. | Course Assessments Assessments |
Attendance Excuse Codes | Attendance codes are used in the process of attendance entry management. | Attendance > Attendance Excuse Codes |
Scheduling Teams | Teams or groups are used often in middle schools for keeping a subset of a grade level together in core or home room classes. | Team (Scheduling Group) Setup |
Section Team Assignments | Team assignments are chosen on course sections and mark that section for enrollment by that team only. This option keeps the current Team selection from the Section editor in the new calendar. | Sections > Team |
Calendar Overrides | Calendar overrides applies to the types of overrides that are used at the school to determine enrollment for next year. A student may be accepted to the school based on a specific curriculum program, administrative decision or economic status. Mark this option if using the School choice with Student Assignment process. | Calendar Override Setup |
| GPA Calculations | Any custom GPA calculations associated with the original calendar are copied into the new calendar, unless the GPA calculation is marked as Inactive. | GPA Calculation Setup Calendar GPA Calculation Setup |
