Classic View: Census > People > FS Deposit
Search Terms: Food Service Deposit
This functionality is only available in districts that have purchased Campus Point-of-Sale as add-on functionality.
The FS (Food Service) Deposit tab allows a district to enter new deposits, void existing deposits and review account balances for a patron with a POS account. In general, this tool is used for a district or school staff member whose account is not attached to a household record in Campus.
Deposits for student patrons should be handled through the Household FS Deposits tool, which allows a deposit to be dispersed among various members of a household.
View Existing Deposits
The FS Deposit tab is designed for making and tracking individual deposits to food service accounts. Deposits made through the Household FS Deposits tool will show the amount of the deposit specifically allocated to the account being viewed (e.g., if a household deposit of $100 is split between two patrons, this tool will only show the $50 applied to this account).
This tool will only display deposit transactions. For a complete summary of all account activity (e.g., deposits, purchases, adjustments), please view the account Journal tool.
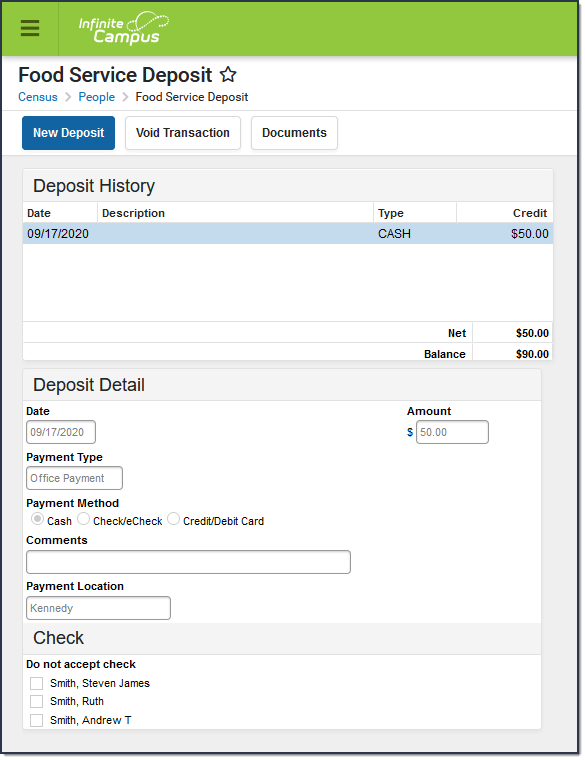 Individual Food Service Deposit Tab
Field Descriptions
Field | Description |
|---|---|
Date | Date for which the deposit should be recorded. |
Amount | The amount to be deposited. |
Payment Type | This field will auto-populate with the value "Office Payment" when the deposit is made through this tool. If the deposit was made by a parent/student using the My Cart payments tool in Campus Parent or Campus Student, this field will indicate that the payment was made "Online." |
Payment Method | Payment method used for the deposit. |
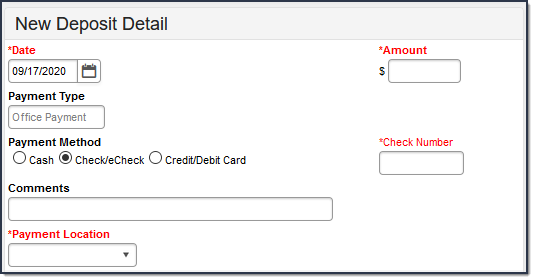
Check Number | This field only appears when the Payment Method selected is "Check/eCheck." This field should contain the number of the check. |
Reference Number | This field only appears when the Payment Method selected is "Credit/Debit Card." This field should contain the credit/debit card number. Only use this field if your district does not use Online Payments. |
Comments | User-entered details on the deposit that will display in the Description column of the Deposits Detail editor of each member's individual account information. |
Payment Location | The location at which the deposit was entered. This dropdown list is populated with items created on the Payment Location tool. |
Do Not Accept Check | A check mark in the Do Not Accept Check box indicates a NSF(No Sufficient Funds) Block has been set for the patron, indicating that the district has had to collect money from this patron. This is a visual flag to warn staff members not to accept checks from this person. A checkmark for patrons in this area does not prevent check deposits. An alert will appear to the staff member attempting to deposit a check for a "blocked" patron, but that staff member may bypass the warning and continue depositing the check. |
Create a New Deposit
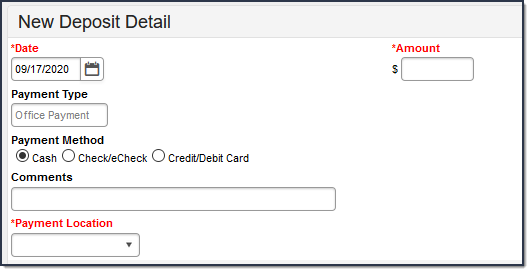
- Select the New Deposit icon. A New Deposit Detail table will appear.
- The deposit Date is auto-filled with the current date, but may be adjusted, as necessary.
- Enter the Payment Amount. This dollar amount can be entered in whole or dollar/cent values (e.g., 100 or 100.00).
- Enter any relevant Comments for this deposit.
- Select a Payment Location.
- Complete the deposit using one of the following Payment Methods.
Payment Method Description Cash Select Cash, then click the Save button.
Check/eCheck The Check # field displays when you select this option. Enter the Check # then click the Save button.
Credit/Debit Card If your district does NOT use Online Payments or a Desktop Card Reader, enter the Reference # then click the Save button.
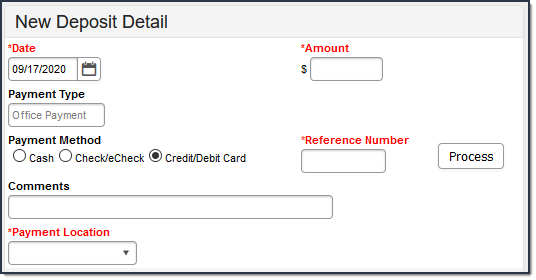
Credit/Debit Card (Card Swipe) Complete these steps if you are using a Desktop Card Reader.
- Click the Process button.
Result
The Card Present Processing window displays. The Card Swipe Processing Mode is automatically selected.
Swipe the card through the card reader.
Result
A progress bar appears in the Card Swipe field. When the process completes, the message changes to Success.If you already entered the Name on Card, click Enable Card Swipe in the Card Swipe field then swipe the card through the card reader.
- Enter the the Name on Card.
- Click the Submit Payment button.
Result
If the transaction is successful, the receipt displays and you can print the receipt from your browser.
- Click the Close button.Result
The new deposit is listed in the Deposit History editor.
Credit/Debit Card (Manual Entry) Complete these steps if you do not have a Desktop Card Reader.
- Click the Process button.
Result
The Card Present Processing window displays.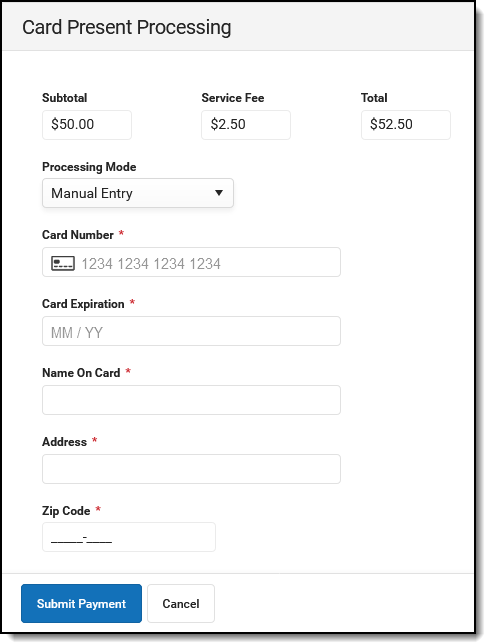
- Select Manual Entry in the Processing Mode dropdown list.
- Fill out the following fields.
- Card Number
- Card Expiration
- Name on Card
- Address
- Zip Code
- Click the Submit Payment button.
Result
If the transaction is successful, the receipt displays and you can print the receipt from your browser. - Click the Close button.
Result
The new deposit is listed in the Deposit History editor.
- Click the Process button.


Void a Deposit
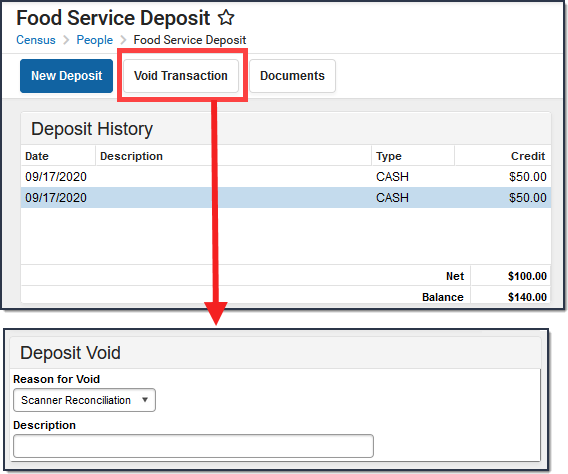
- Click the deposit that you want to void in the Deposit History editor.
- Click the Void Transaction button.
Result
The Deposit Void editor appears. - Select the Reason for Void.
- Add comments in the Description field.
Comments display as the Description in the Deposit History editor. - Click Save.
 Voiding a Transaction
The void and original transactions will both display in red text: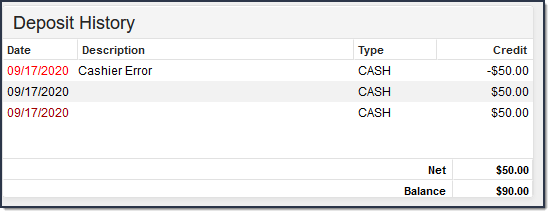 Example Void Deposit
Managing Documents
To view documents, click the Documents button on the action bar. Users with the appropriate tool rights may also complete the following tasks.
