When printing labels generated using one of the label reports in Campus, certain print options may need to be altered by the user to properly align the labels on the page. These print options affect the following label reports:
Label Report |
Report Location |
Label Size |
|---|---|---|
Student Information > Reports |
Avery 5160 |
|
Student Information > Reports |
Avery 5160 |
|
Campus Instruction > Reports |
Avery 5160 |
|
Census > Reports |
Avery 5160 |
|
Grading and Standards > Reports |
Avery 5163 |
|
System Administration > Transportation > Reports |
Avery 74541 |
|
Student Information > General > Summary Tab |
Avery 5160 |
|
Student Information > General > Summary Tab |
#10 Envelope |
|
Point of Sale > Reports > PIN Report |
Avery 5160 |
For all label reports, use the print icon in the top right corner of the PDF window to send the generated labels to the printer.
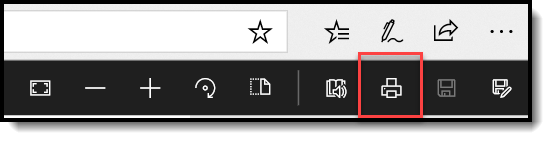 PDF Print Icon
Print Properties for File Labels, Folder Labels, Roster Labels and Mailing Labels
Review the following print properties prior to printing labels. Print properties appear when selecting the Print icon from the PDF report. These options are located in the Page Handling area or the Page Sizing & Handling area of Print Properties.
These are recommendations. Depending on the browser of choice and the Adobe version, different settings may be required to have the information line up properly.
- Page Scaling should be set to None.
- Auto-Rotate and Center checkbox should not be selected.
- Choose paper source by PDF page size should not be selected.
- Select the Fit or Shrink oversized pages option.
Print Properties for Cumulative Labels
Review the following print properties prior to printing labels. Print properties appear when selecting the Print icon from the PDF report. These options are located in the Page Handling area or Page Sizing & Handling area of Print Properties.
These are recommendations. Depending on the browser of choice and the Adobe version, different settings may be required to have the information line up properly.
- Page Scaling should be set to Reduce to Printer Margins or Shrink to Printable Area, depending on the printer.
- Auto-Rotate and Center checkbox should be selected.
- Choose paper source by PDF checkbox page size should be selected.
- Select the Actual Size radio button.
Label Alignment Trouble Shooting and Suggestions
Every printer is different. If you are having issues with label alignment, use the list of prioritized suggestions below. Adobe also provides community forums for asking other users for assistance - https://forums.adobe.com/community.
| Done | Suggestion |
|---|---|
| Print out the first page of the label report and place a full sheet of blank labels behind it. Hold this up to the light to see if the printed format and the labels align. If they do not align, turn off the Fit to page print option and print the report. | |
In the printer menu, remove any selection of the following from the Print settings (options vary depending on Adobe version):
|
|
| Set the Reduce/Enlarge option to Off. | |
Set Paper Type to Labels, Print Quality to Best, choose Heavyweight or Cardstock if no labels are set. 5160 is a laser label. 8160 or 18660 are inkjet labels. The type of labels must match to the printer type for the best printing. Match laser labels to laser printers, inkjet labels to injet printers. |
|
| Check for latest printer driver on the brand name of the printer in use. Download driver for the model number of the printer. Restart your computer. Most printers have a universal driver. If printing labels, the proper unique printer driver must be in use in order for the printer to understand the size of the label(s) and does not try to use a generic size. | |
| Make sure the printer does not have the Print on both sides (or Two-sided) check box marked in the menu. The Print on both sides (or Two-sided) option can interfere with Avery templates. | |
Try printing from another printer or from another computer. |
|
| Download latest free version of Reader or Acrobat, or update to latest version for bug fixes, if any exist, from the latest version of the software. | |
| Try restarting your computer to clear the memory and cache file. Try restarting the printer. |
Folding Letters for Window Envelopes
When folding letters or reports to fit into envelopes, fold the letter into horizontal thirds. Adjustments to the size of the folds will need to made, depending on the paper being used (school stationary, Campus header, etc.).
- Place the letter to be folded in portrait orientation, where the longest side of the paper is on the left and the shortest side is on the top.
- Determine where the paper is divided into thirds. Use a ruler for more precise folding. On an 8.5" x 11" piece of paper, the folds occur around the 3-inch mark and the 7-inch mark.
- Fold the bottom third of the paper up towards the top of the letter, making a crease. This fold is at about the 7 1/8" mark, or use the body of the letter as a guide (the second line of the body).
- Fold the top third of the paper back towards the other side of the letter, making a second crease at about the 3 1/4" mark. This third of the paper is slightly less than a third. The letter should now be laying with the address facing up. If the letter is laying length-wise, so the short edge is facing you, the sides would be in a Z shape.

Addressed Letter Fold
