Academic Programs (formerly CTE Programs) can be added to the student's Programs tab. Academic programs are created in the Academic Programs option in the Program Admin module. Once the Program is assigned to the student, Progress and Course Plan information needs to be entered.
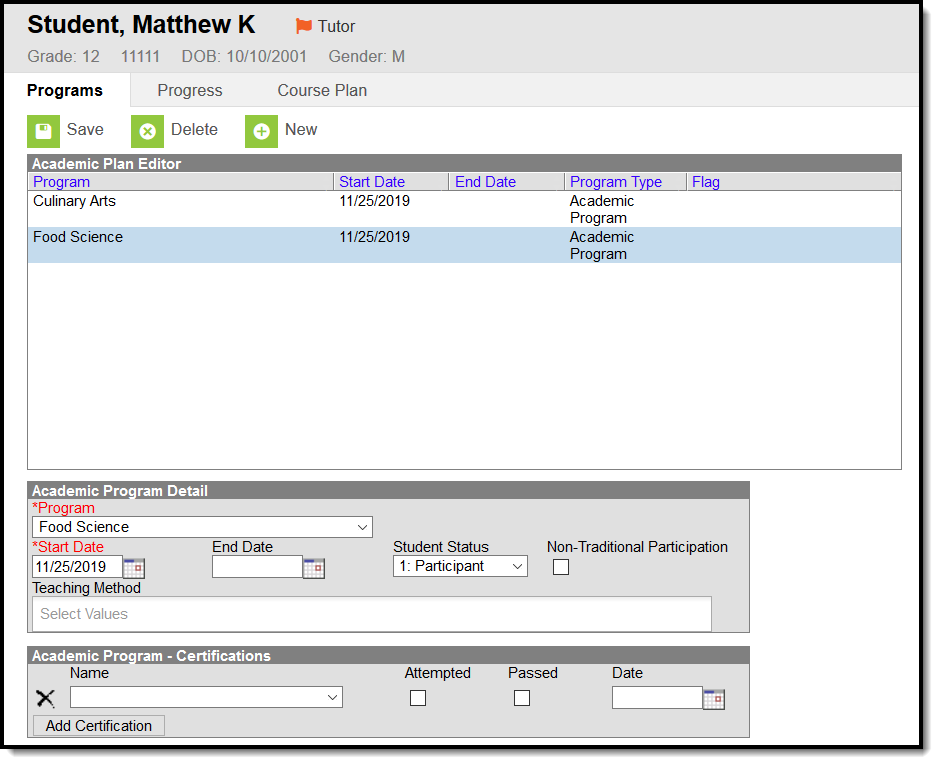 Academic Program Detail
Unlike Graduation Programs, there is no limit to the number of Academic Programs assigned to a student.
Students may be assigned to the same Academic Program more than once when start and end dates do not overlap. Progress monitoring, course plan requirements, alerts and academic program reports consider current academic programs- programs without an end date and those with a future end date.
Academic Program Editors
The following defines the available fields on the Academic Program Detail Editor. Additional fields may be included on this editor for state reporting purposes.
Field | Description |
|---|---|
Program Required | Selection indicates the graduation program assigned to the student. Only those programs that are marked active and whose Cohort Years fields are empty or cover the student's NCLB Cohort Year fields are included in this. If the student is assigned to a program that has since been marked as inactive, that program displays at the end of the Program list in red text. |
Start Date Required | Entered date reflects the date the student began working towards achievement in the program. Dates are entered in mmddyy format or the calendar icon can be selected to choose a date. |
End Date | Indicates the date the student stopped working towards achievement in the program. Dates are entered in mmddyy format or the calendar icon can be selected to choose a date. |
| Student Status | Indicates the participation level of the student - (1) Participant, (2) Concentrator, (3) Completer. In some states, the options available for selection are defined by the state and may differ from the options listed above. Selection of these is often determined by federal CTE definitions, and is used in state reports. |
| Non-Traditional Participation | This checkbox indicates the student is participating in a program that is often outside of the norms of the program's general makeup, based on gender, race or age. An example is a male student enrolled in a program that is often dominated by females in the workforce (daycare, nursing, etc.). This is not a required selection, but does help with data analysis. |
| Teaching Method | Selection indicates how the student is instructed, or how the student learns the necessary items involved in the career/technical ed program. |
| Flag | If the Academic Program is marked as Flagged and assigned a Flag Image, an image displays in this column and next to the student's name. If there is no flag assigned, nothing displays in this column. |
The following defines the available fields on the Academic Program Certifications Editor.
Field | Description |
|---|---|
| Name | Indicates the certificate the student attempts to receive upon completion of a number of courses. |
| Attempted | When marked, indicates the student took the necessary assessment for the program. |
| Passed | When marked, indicates the student passed the necessary assessment for the program. |
| Date | Indicates the date the student attempted and/or passed the assessment. |
The procedures below are used to assign an academic program to one student. If you need to assign programs to multiple students, use the Batch Assignment Tool.
Add an Academic Program
- Select the New icon. A Program Detail table appears below the Program Editor.
- Choose a Program Type. When adding an Academic Program, select the Academic Program option.
- Select the Academic Program to assign to the student from the dropdown list.
- Enter the Start Date for the program.
- Click the Save icon when finished. The new program is listed in the Program Editor table. If a flag and a flag image has been assigned to the Program, that image displays next to the student's name, in the Editor table and when viewing the detail of the program.
End an Academic Program
- Select the Program from the Program Editor.
- In the Program Detail area, enter an End Date for the program.
- Click the Save icon when finished. This keeps a record of the program being assigned to the student, until another program is assigned.
Replace a Program
If a program was assigned to the student in error, or the student needs to be reassigned:
- Select the existing program from the Program Editor.
- Select the correct program in the Program dropdown list to assign to the student.
- Enter the Start Date of the program.
- Click the Save icon. The newly selected program displays in the Program editor.
Delete Program Information
To delete a program from a student, select the entry to be deleted from the Program Detail area and click the Delete icon. This permanently removes the program from the student’s record.
Documents
To view documents, click the Documents button on the action bar. See the Student Person Documents article for more information.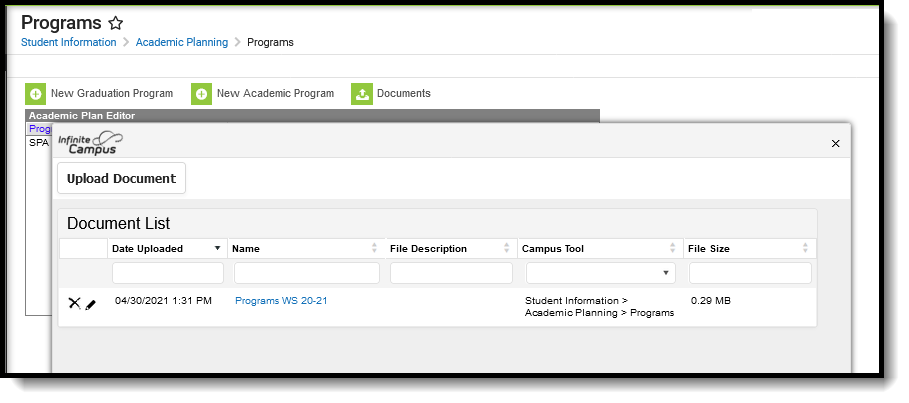 Document Upload Tool
