Classic Path: System Administration > Census > Relationship Type
Search Terms: Relationship Type
The Relationship Types are used in the Census module when establishing relationships (e.g. mother/daughter) between persons. A district can create as many possible scenarios for relationships as needed.
 Relationship Type Tool
When a new relationship is created, it is available for selection on the Relationship editor.
Relationship Type Tool
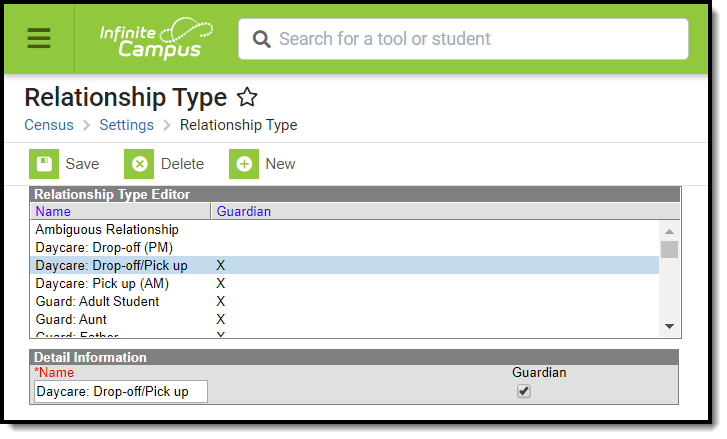
The Relationship Type Editor has two parts: the Relationship Type Editor and the Detail Information.
- The Relationship Type Editor allows users to sort the list of relationships by Name or Guardian. The default sort is by Name.
- The Detail Information displays the name of the relationship type and the indication of that relationship being a guardian relationship.
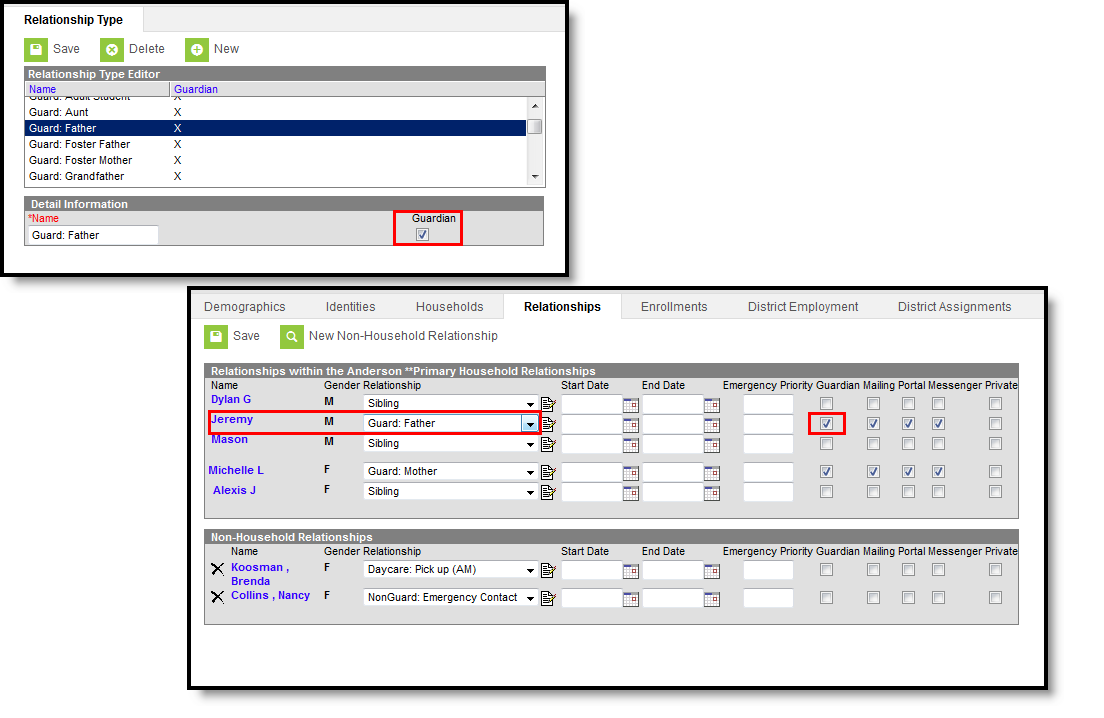
When a relationship is marked as being a Guardian, it is an indicator only of what relationships should be used to assign to guardians. The Guardian checkbox still needs to be chosen for the appropriate individuals when creating relationships between individuals.
 Relationship Type - Guardian
State Edition Users
Ed-Fi Relation Type
The Ed-Fi Relation Type field displays in states when Ed-Fi is set to Tools Only or On. For Ed-Fi districts, this field reports in the Student Parent Association resource and indicates the nature of an individual's relationship to a student.
 Ed-Fi Relation Type
Create Relationship Types
- Select the New icon. Below the Relationship Type Editor, a Detail Information view will appear.
- Enter a Name for the relationship.
- Check the Guardian box if this relationship can be set up as a guardianship type of relationship. For example, parent is the guardian of the child.
- If your state and/or district is using Ed-Fi, select the Ed-Fi Relation Type option for the relationship.
- Click the Save icon when finished. The new relationship will be listed in the editor and can be selected when building relationships between people in the Census module.
When creating relationship types, it is advised that a consistent naming pattern be used to eliminate confusion when establishing the relationships.
Delete Relationship Types
A relationship can only be deleted if it is not being used (i.e., there are no relationships of that type in existence in the database table).
- Select the relationship type to be deleted from the Relationship Type Editor. A Detail Information view will appear.
- Select the Delete icon from the action bar.
- If the relationship type is assigned to designate a relationship between two people in the Relationship editor, a warning message will appear indicating the deletion cannot occur (see Image 4). Click the OK button on the warning message to continue.
- Proceed with the appropriate action - review the existing relationship between the two people or determine the need to keep the relationship.
If the relationship type is not assigned to a relationship between two people, a warning message will appear asking the user to verify the deletion.
Modify Relationship Types
When a relationship type is modified, the modification is immediately available for selection in the Relationships editor in Census and all existing relationships that were assigned the previous relationship type will be updated.
- Select the relationship type to be modified from the Relationship Type Editor. A Detail Information view will appear.
- Make the appropriate change to the selected relationship.
- Click the Save icon from the action bar. A confirmation warning message will appear indicating the relationship type will be modified. Click the OK button to continue or the Cancel button to stop the modification.
Once the modification has been confirmed, the relationship type will be updated throughout its use in the product.
