The Pull Delivery Mode allows users to pull data from Campus and export it to a predetermined destination. This article walks you through the steps needed to properly configure and setup up the process for saving Data Extract reports to other machines via a Data Extract Utility Client.
If you are experiencing connectivity issues with the Data Extract Utility Client using the Pull method, see this article.
This section includes the following topics:
Prerequisites
The following must be completed prior to setting up the Data Extract Utility Client:
- Extracts need to be created within the Data Extract Utility.
- Extracts within the Data Extract Utility need to be set to a Delivery Mode of PULL.
Configure the Data Extract Utility Client
The following steps will walk you through configuring the Data Extract Utility Client:
- Download the zip file and extract it to the machine you would like data pulled onto.
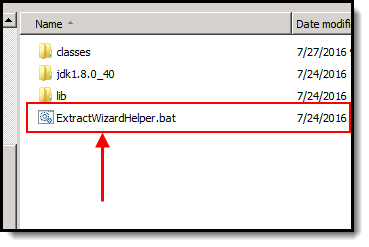
- Double-click the ExtractWizardHelper.bat file. The Infinite Campus Export Wizard Config tool will appear.
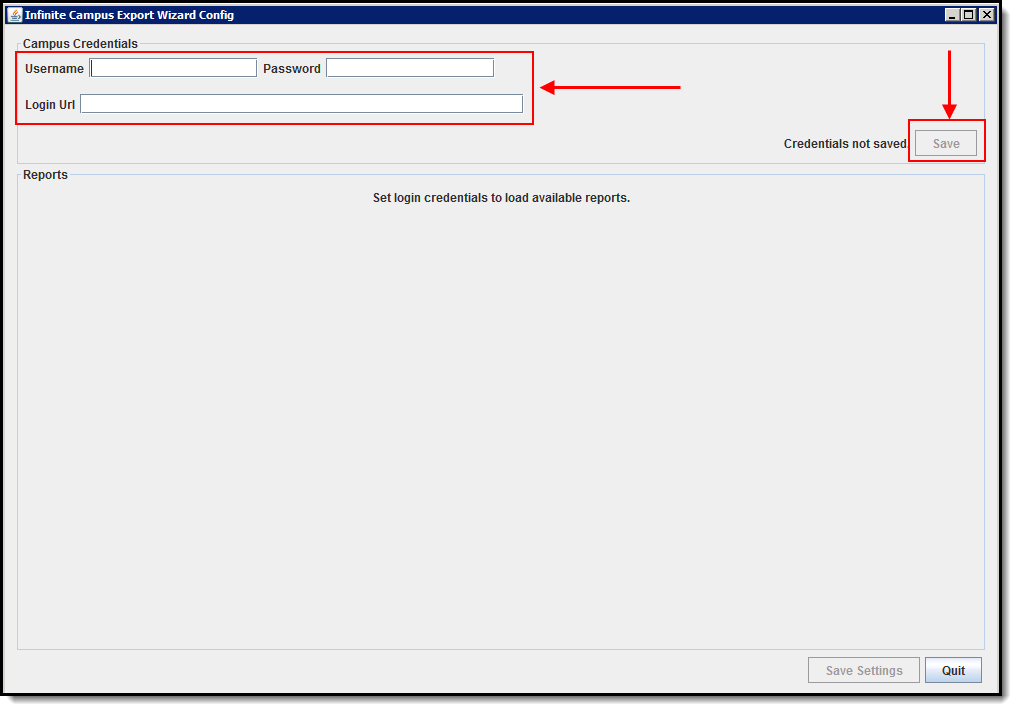
Enter the Username, Password, and Login URL (must be HTTPS) and click the Save button. Your Campus Username and Password are the values you should enter in these fields and the URL of your Campus login page is the value you must enter in the URL field.
THE LOGIN URL MUST BE HTTPS
Campus recommends you create a new user to pull extracts and give Campus login and Data Extract Utility tool rights to this user.
Once logged in, you will see the reports set up in the Data Extract Utility within Campus (see image below).
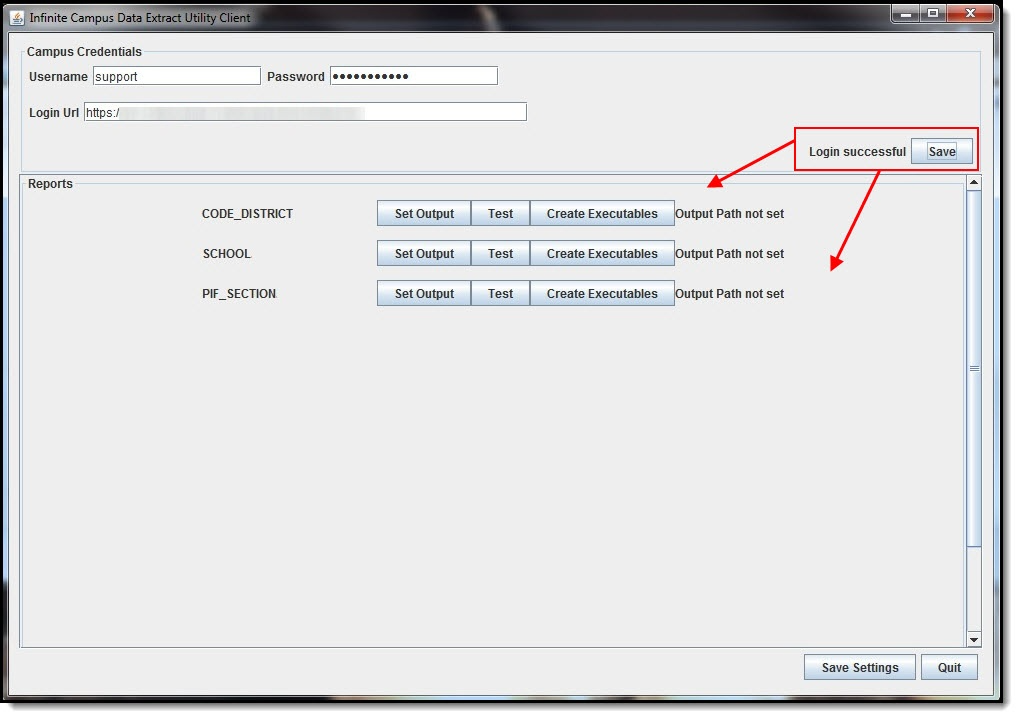
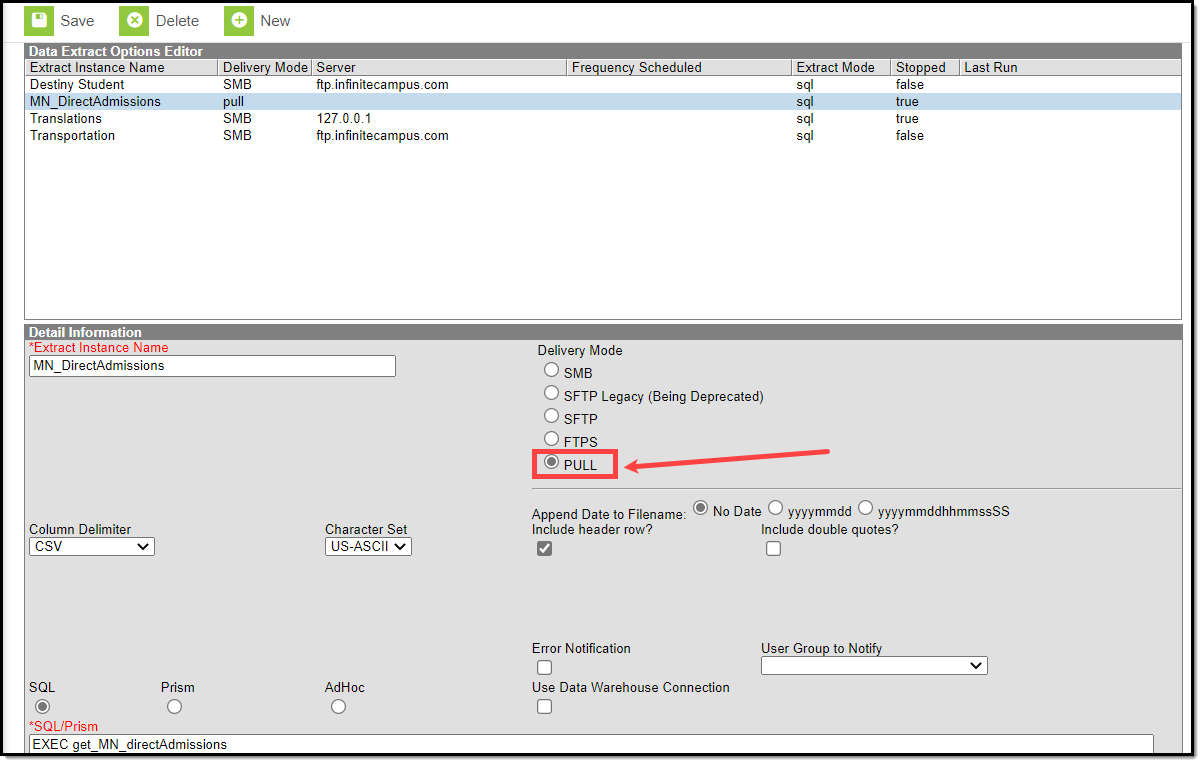
Only reports in the Data Extract Utility Set Up tool with a Delivery Mode of PULL can be configured to pull and report data via the Data Extract Utility Client. To modify existing reports to use HTTPS Pull, go to System Administration > Data Utilities > Data Extract Utility and update the Delivery Method to PULL (select image below).
You will need to quit and reopen the Data Extract Utility Client to see modifications made to reports.
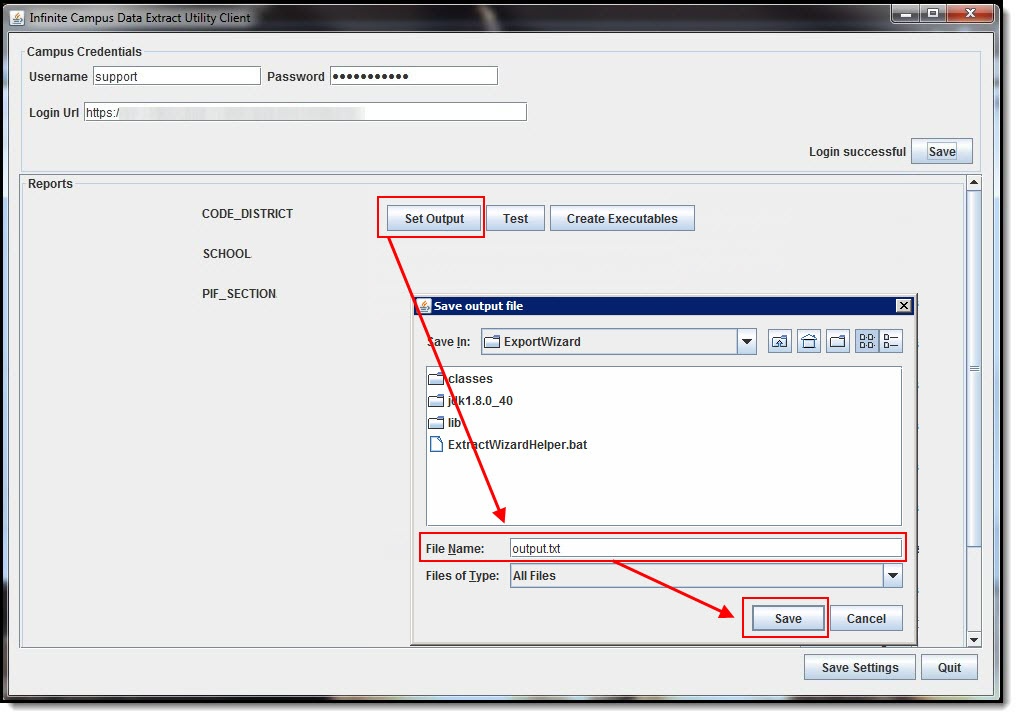
Click Set Output for the report you want to configure, enter the filename and extension type (i.e., csv, txt, etc) and click the Save button.
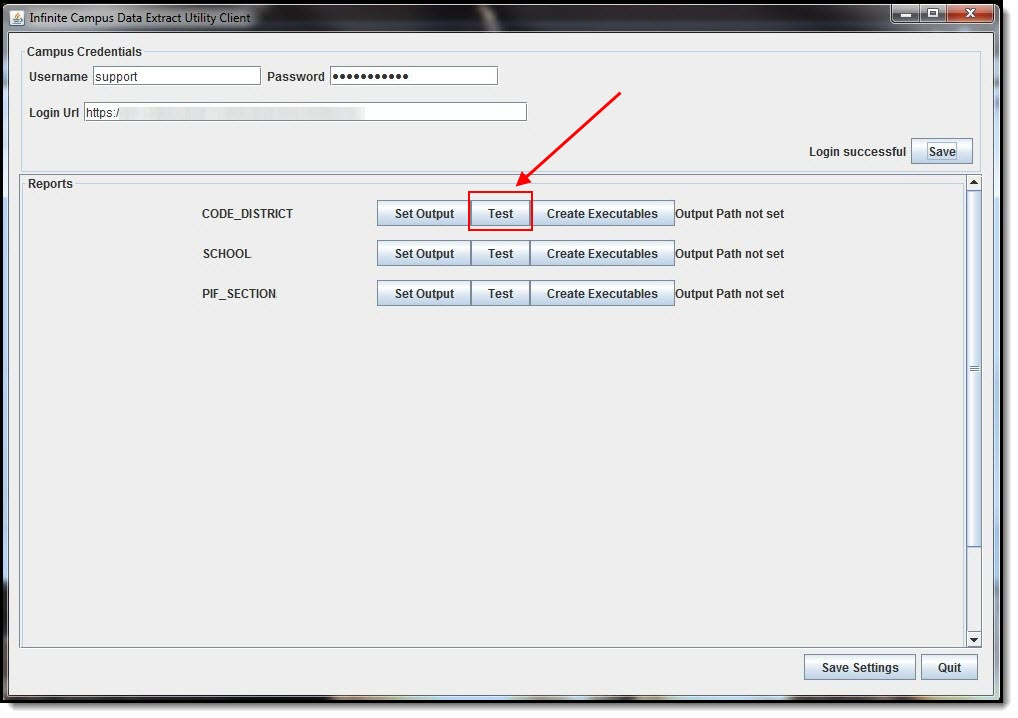
- Now that the file is being properly pulled down into the directory specified in the previous step, you should now test the report by clicking the Test button to verify the file was written to the proper location. The Output Path column will update with the location of the file.
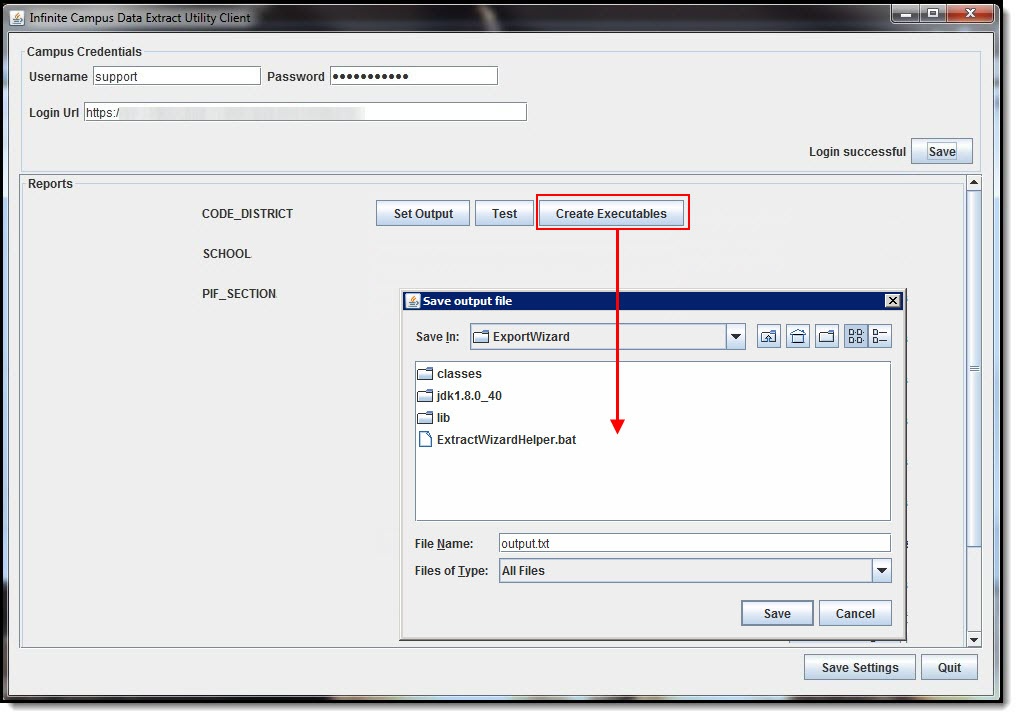
- Verify the Output Path populated by the previous step is correct. If so, select the Create Executables button to set the directory you would like the bat file and properties files to be written. The bat file can now be scheduled to pull the report. The Create a Windows Scheduled Task section below will explain more about this process.
- The previous step has now placed a .bat file within the directory. This .bat file is named by the extractID from Campus but has a remark in the filename to help identify the report (see example below).
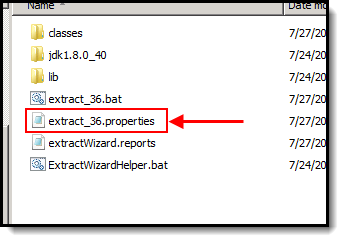
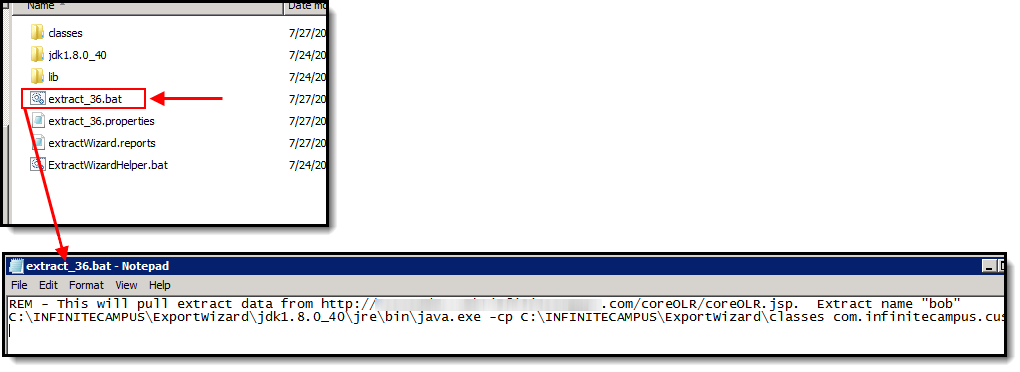 Settings for what has been configured is saved in the extract_XX.properties file.
- Move on to and complete all steps in the Create a Windows Scheduled Task section described below.


 Settings for what has been configured is saved in the extract_XX.properties file.
Create a Windows Scheduled Task
Now that the Data Extract Utility Client has been configured, you must now follow these steps and create a Windows scheduled task:
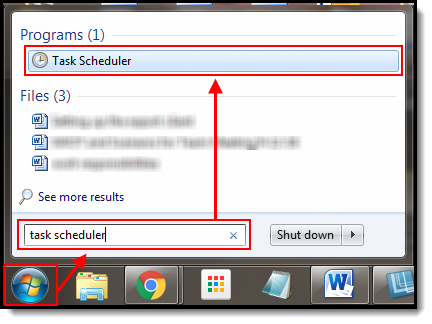
Open the Task Scheduler tool by selecting the Windows Start Menu button, searching for Task Scheduler, and selecting the tool in search results (see image below).
Setting up a Windows Scheduled Task is required on any version of Windows however, the example below shows the process within Windows 7. The details and screens used to walk through this process may vary based on your version of Windows.
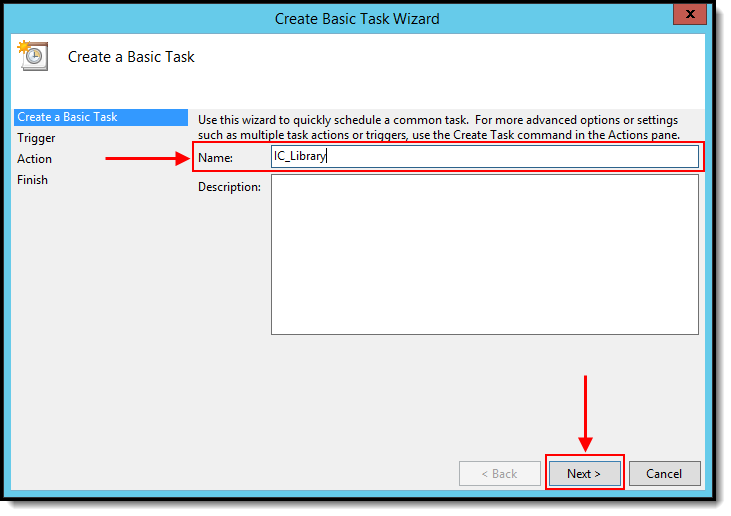
- Once the Task Scheduler has been opened, click Action at the top and select Create Basic Task.

- Give the task a Name that is descriptive of the job (for example, IC_LibraryExtract, IC_Transportation, etc) and click Next.
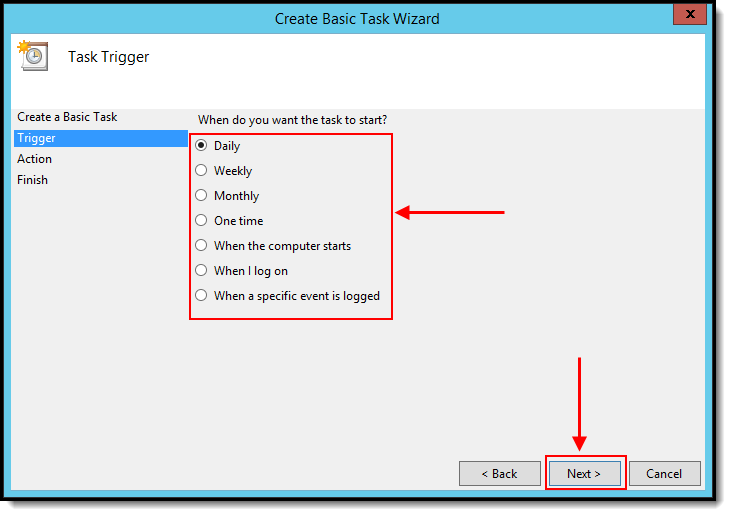
- Select the frequency of the task (i.e., Daily, Weekly, Monthly, etc) and click Next.
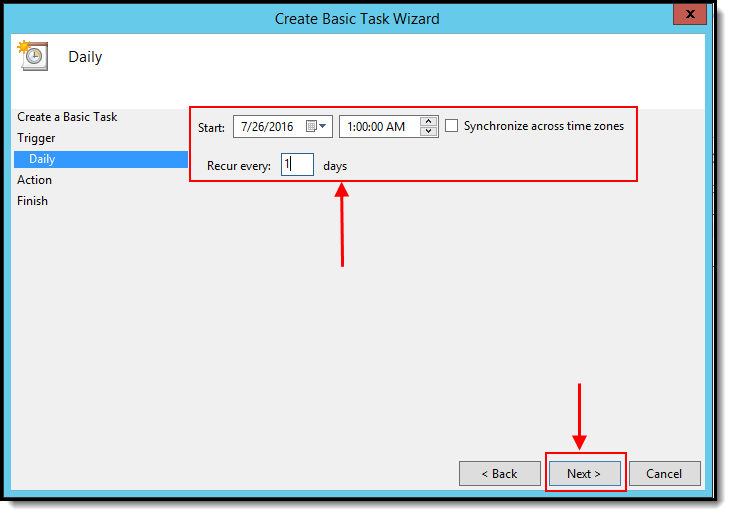
- Enter the Start Date, Time and Recurrence of the task. Once entered, select the Next button.
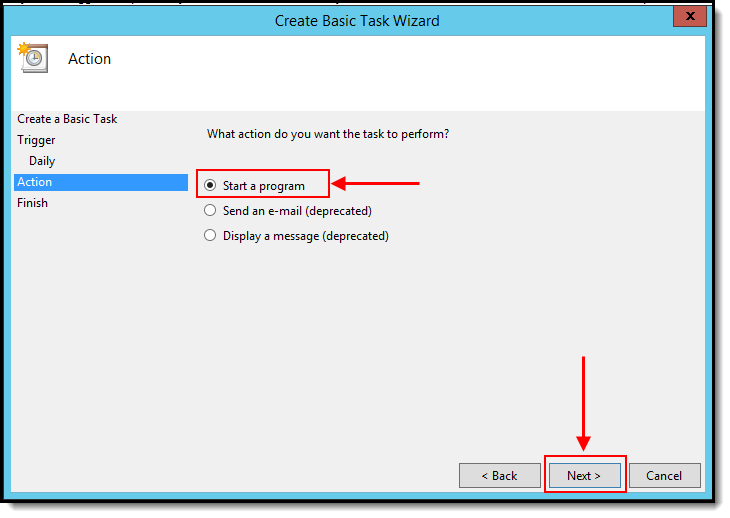
- By default the Start a Program option will be selected. If not, select this option and select the Next button.
- Click the Browse button and locate the .bat file created via the Campus Data Extract Utility (Step 6 in the section above).
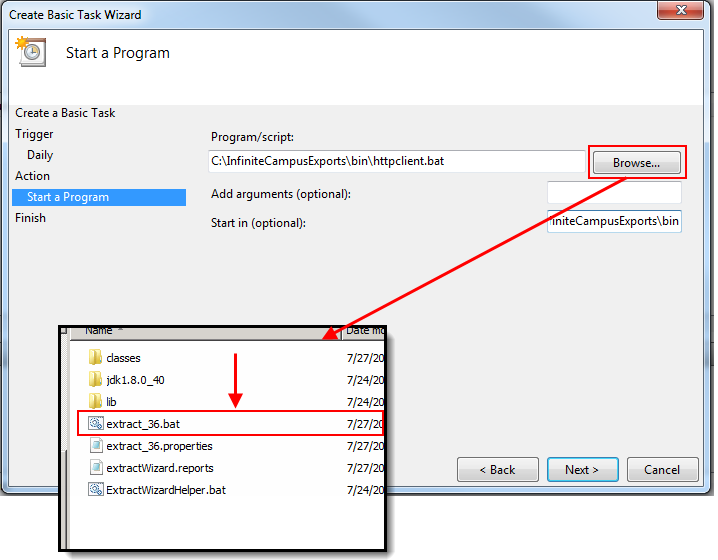
- In the Start in (optional) field, copy and paste the directory of the .bat file.
For example, if the .bat file is located at C:\InfiniteCampusExports\bin\httpclient.bat, the value you would enter in the Start in (optional) field would be C:\InfiniteCampusExports\bin.
Once entered, select the Next button.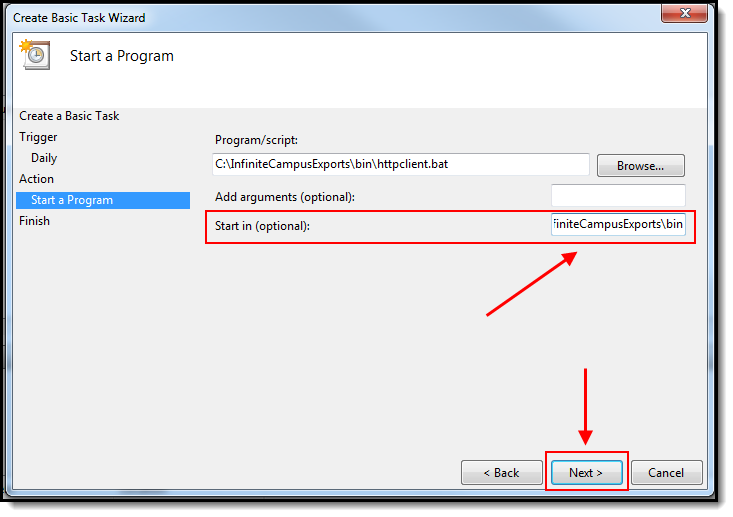
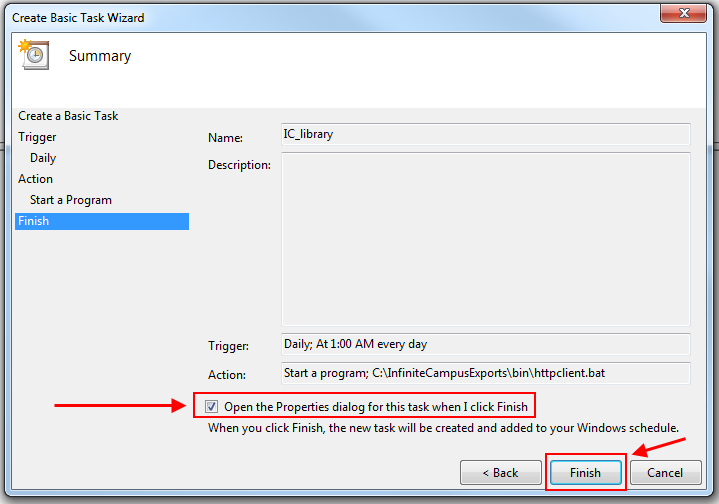
- Mark the Open the Properties dialog for this task when I click Finish checkbox and select Finish.
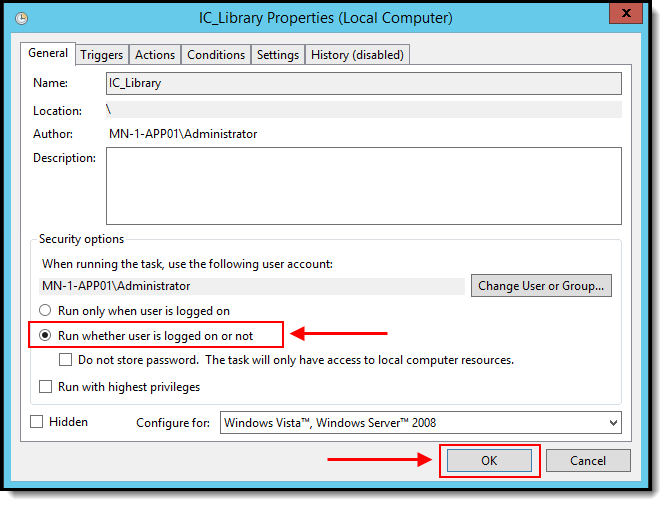
- Select the Run whether user is logged on or not option and click OK.
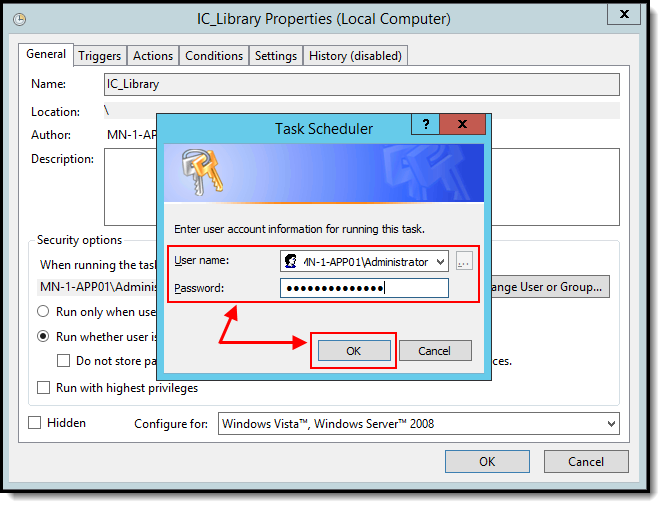
- Enter the User Name and Password for the Windows user who will run the task(s) and click OK.
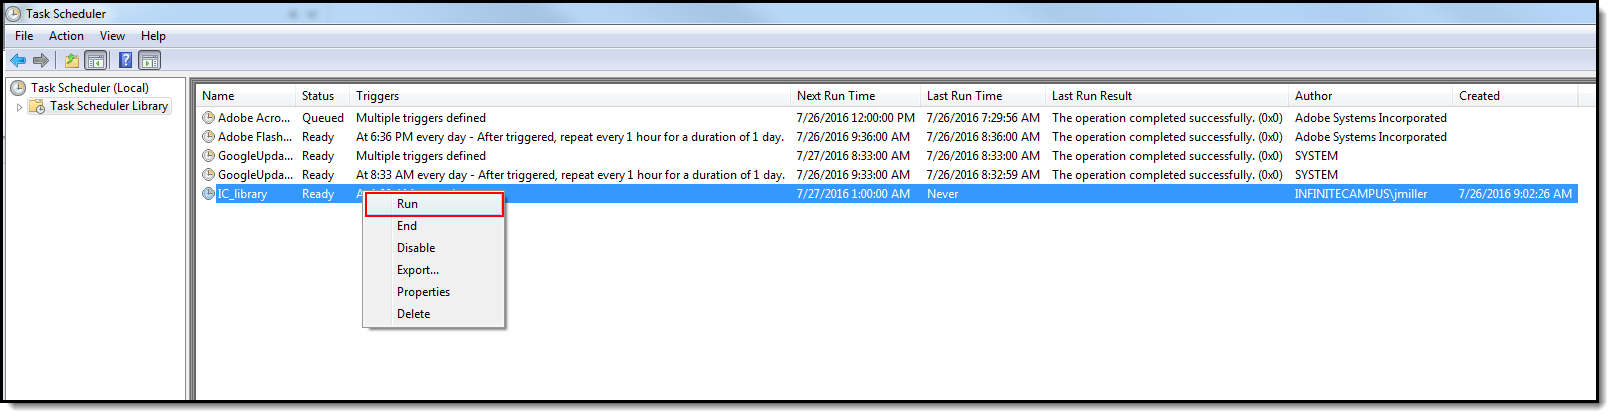
- The scheduled task is now setup and will run on the schedule specified. This task can be manually run by right-clicking on the task within the Task Scheduler and selecting Run.