Tool Search: Counseling Scanning
The Counseling Scanner tool is used to check students into the counseling office in a kiosk mode. Click the Launch Kiosk button to begin taking attendance in an untended mode. Click the Launch Attended Mode button to begin taking attendance in an attended mode.
Selecting the Launch Kiosk w/ Camera option from the dropdown allows users to use the device's webcam to take a picture of the student's ID and use that to scan them in.
 Counseling Kiosk Tool
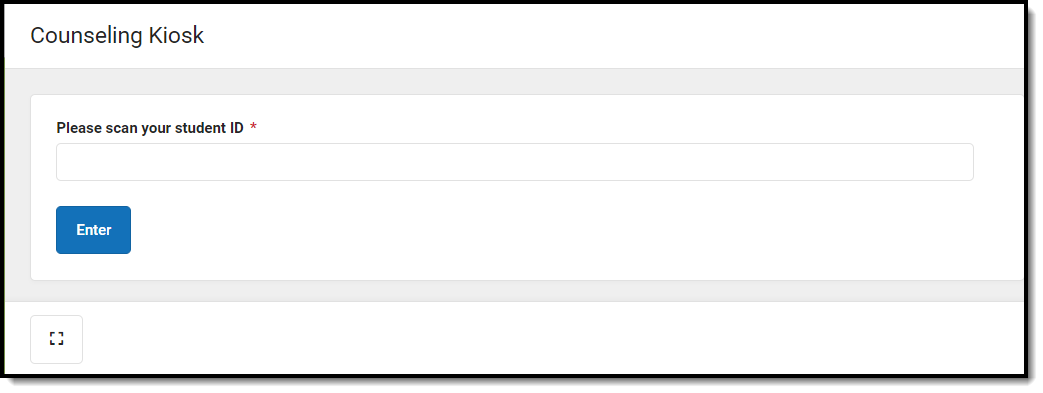
Counseling Kiosk
Once the Counseling Kiosk tool is launched, a separate window displays and the user is automatically logged out of Campus. This allows students to check in to the counseling office without having access to a Campus account.
 Counselor Scanning Kiosk
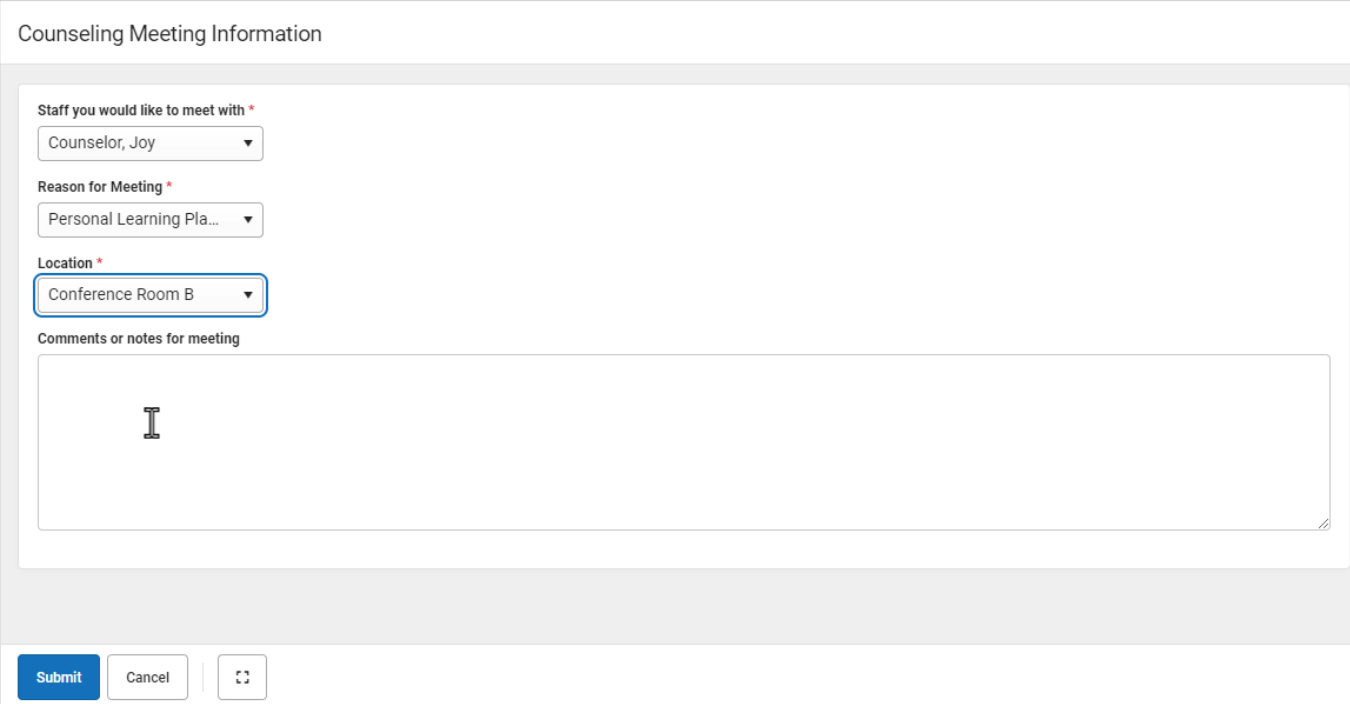
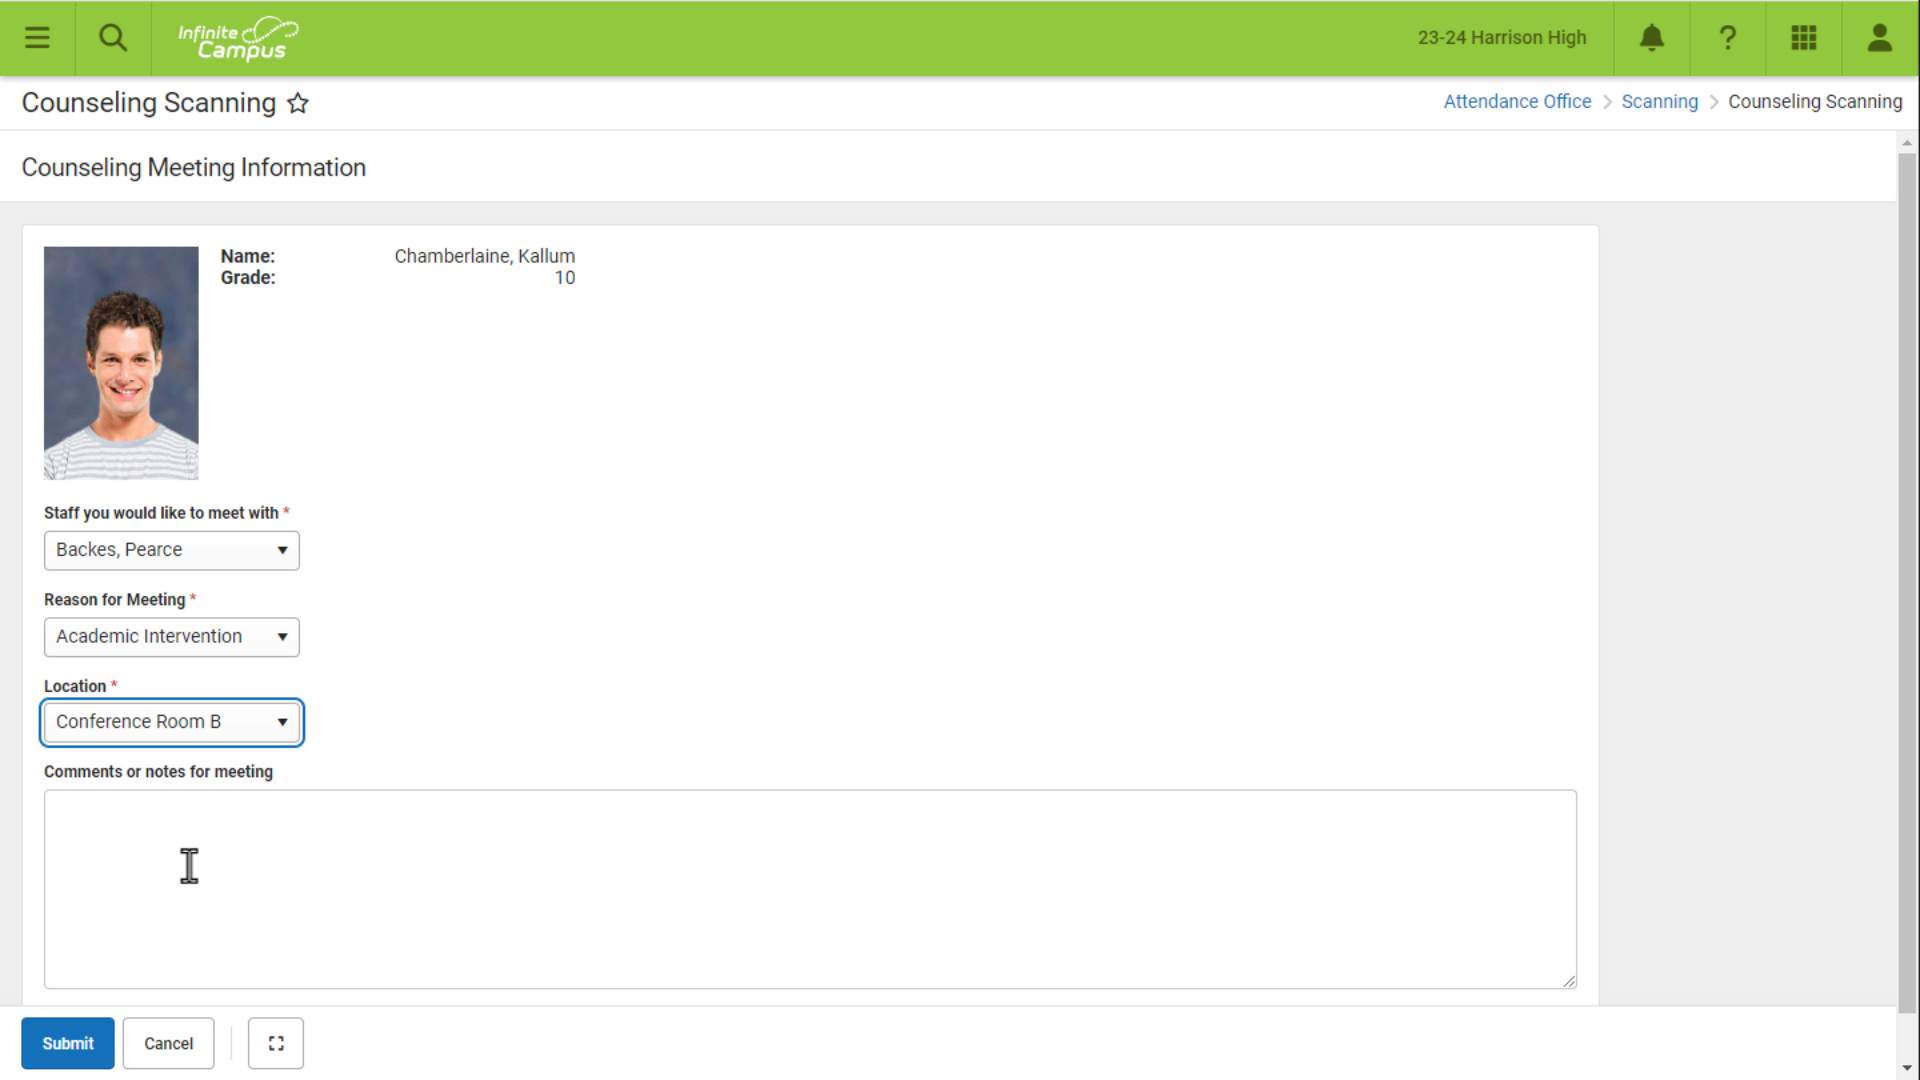
Once a student enters or scans in a student ID, the Counselor Meeting Information screen displays.
 Counselor Meeting Information
The student then enters information concerning the counseling meeting:
- Select a staff member from the Staff you would like to meet with dropdown.
- Select a Reason For Meeting from the dropdown.
- Select meeting location from the Location dropdown.
- Enter any Comments or notes for meeting in the text field.
- Click Submit or Cancel.
The Reason for Meeting and Location fields are populated with values set up in the Attribute/Dictionary. See the Manage Custom Counseling Meetings Fields document for additional information.
The student's attendance is automatically captured on the counselor's Meetings tool at Counseling > Meetings. See the Meetings documentation for additional information.
Counseling Attended Mode
Once the Counseling Office Attended tool is launched, counseling staff can enter or scan in student ID numbers.
 Counseling Attended Mode
Once a student enters or scans in a student ID, the Counselor Meeting Information screen displays.
 Counselor Meeting Information
The student then enters information concerning the counseling meeting:
- Select a staff member from the Staff you would like to meet with dropdown.
- Select a Reason For Meeting from the dropdown.
- Select meeting location from the Location dropdown.
- Enter any Comments or notes for meeting in the text field.
- Click Submit or Cancel.
The Reason for Meeting and Location fields are populated with values set up in the Attribute/Dictionary. See the Manage Custom Counseling Meetings Fields document for additional information.
Tip: The Expand button can be used to extend the work space to the full size of the user's screen. Click the Expand button again or Esc on the keyboard to exit full screen mode. ![]()
